API Access Token
Table of Contents
- Video walk-through
- Account tokens vs user tokens
- Getting to the account access token page
- Generating an account access token
- Obtaining the generated access token
- Viewing and editing the permissions of a scoped access token
- Removing an account access token
- Have more questions?
To access the DNSimple API, you need an access token.
To create an application that requires access to DNSimple, or let an external application request authorization to private details in a user’s DNSimple account without a password, you need an OAuth Token.
Video walk-through
Account tokens vs user tokens
The API offers two types of tokens: Account and user.
The user token gives you access to any resource associated with any account the user has access to. An account token gives you access only to the resources connected to that account.
Tip
We recommend using account tokens unless your application needs multi-account access via a single token.
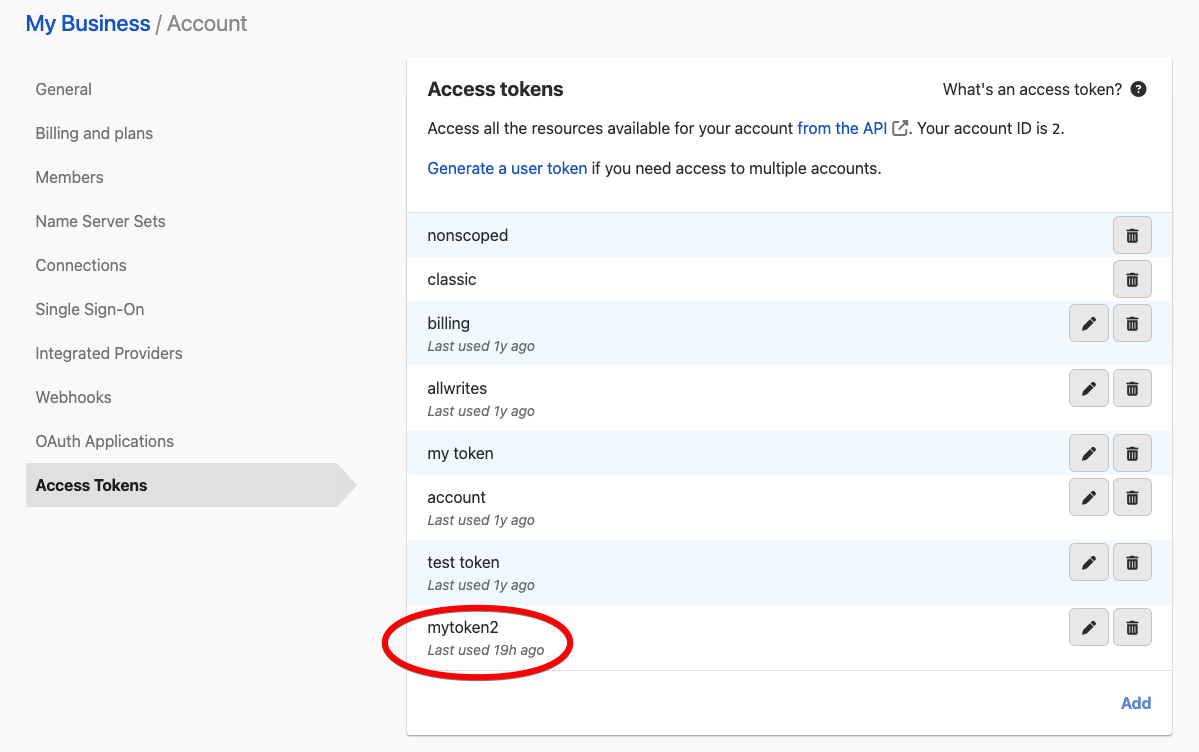
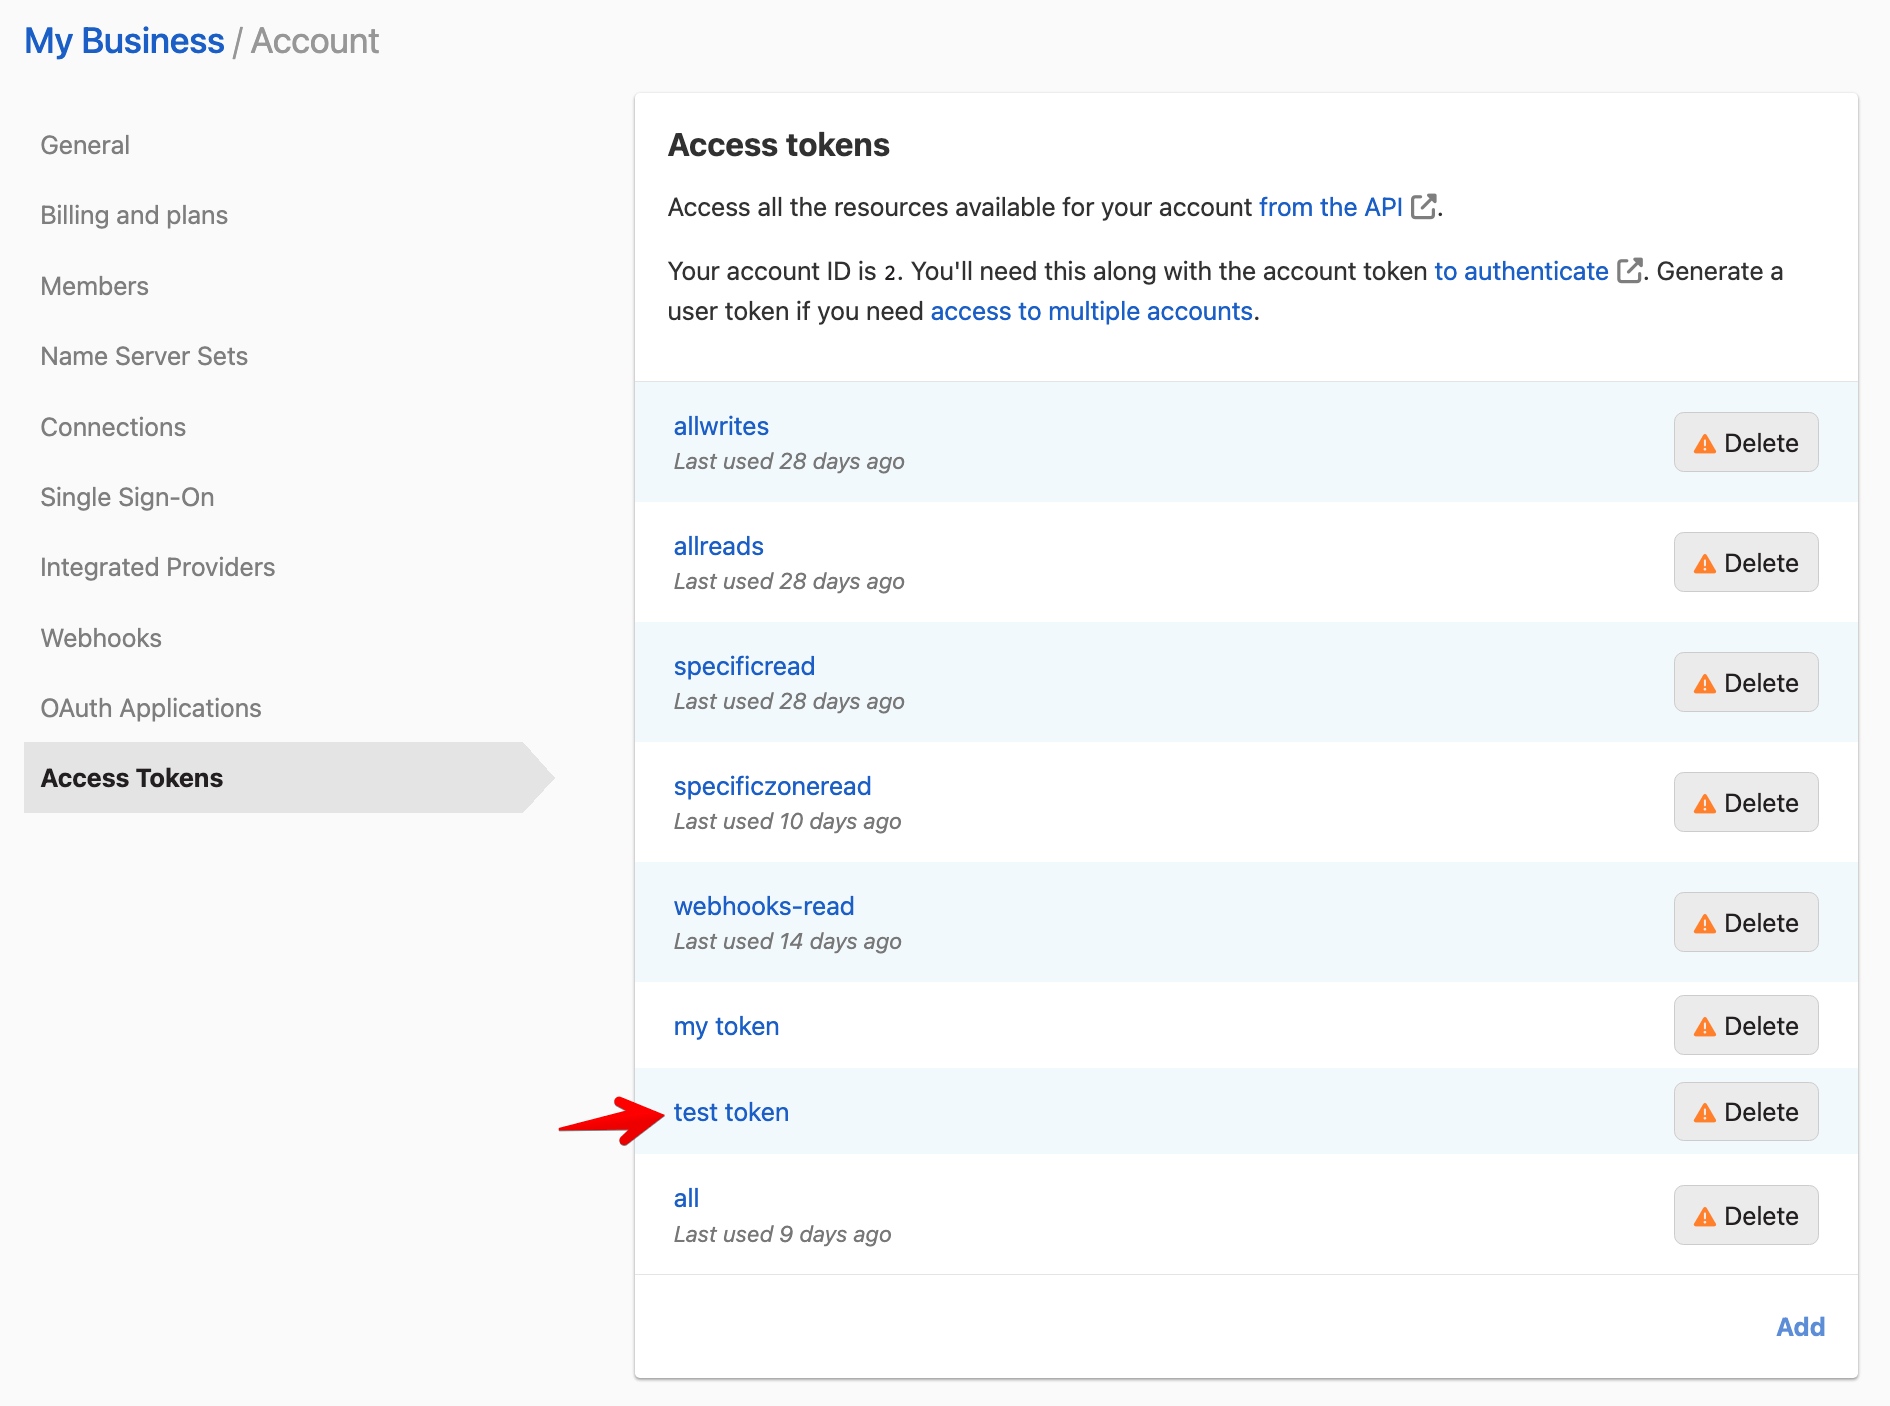
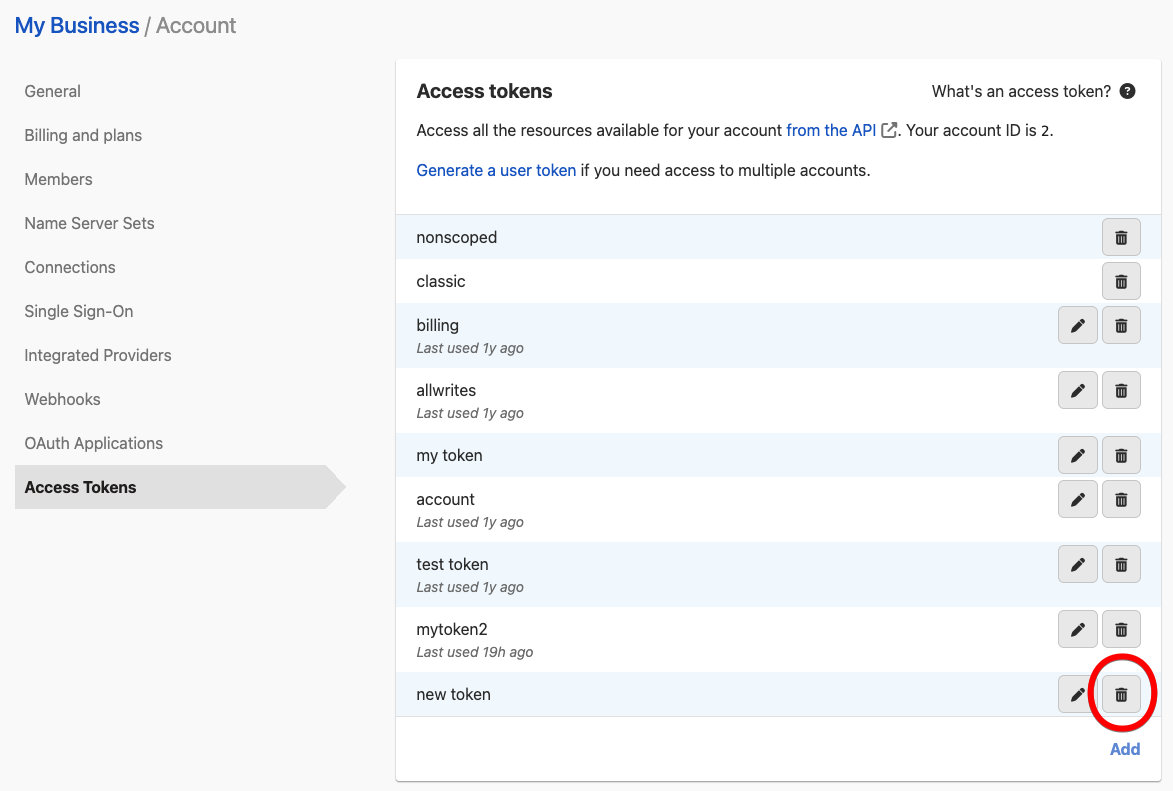
Getting to the account access token page
- Navigate to your account page.
- Click the Access Tokens tab on the left side.

This shows all of your account access tokens and allows you to add new access tokens or remove existing ones.
You can find the last used date of an access token on the list of existing access tokens.
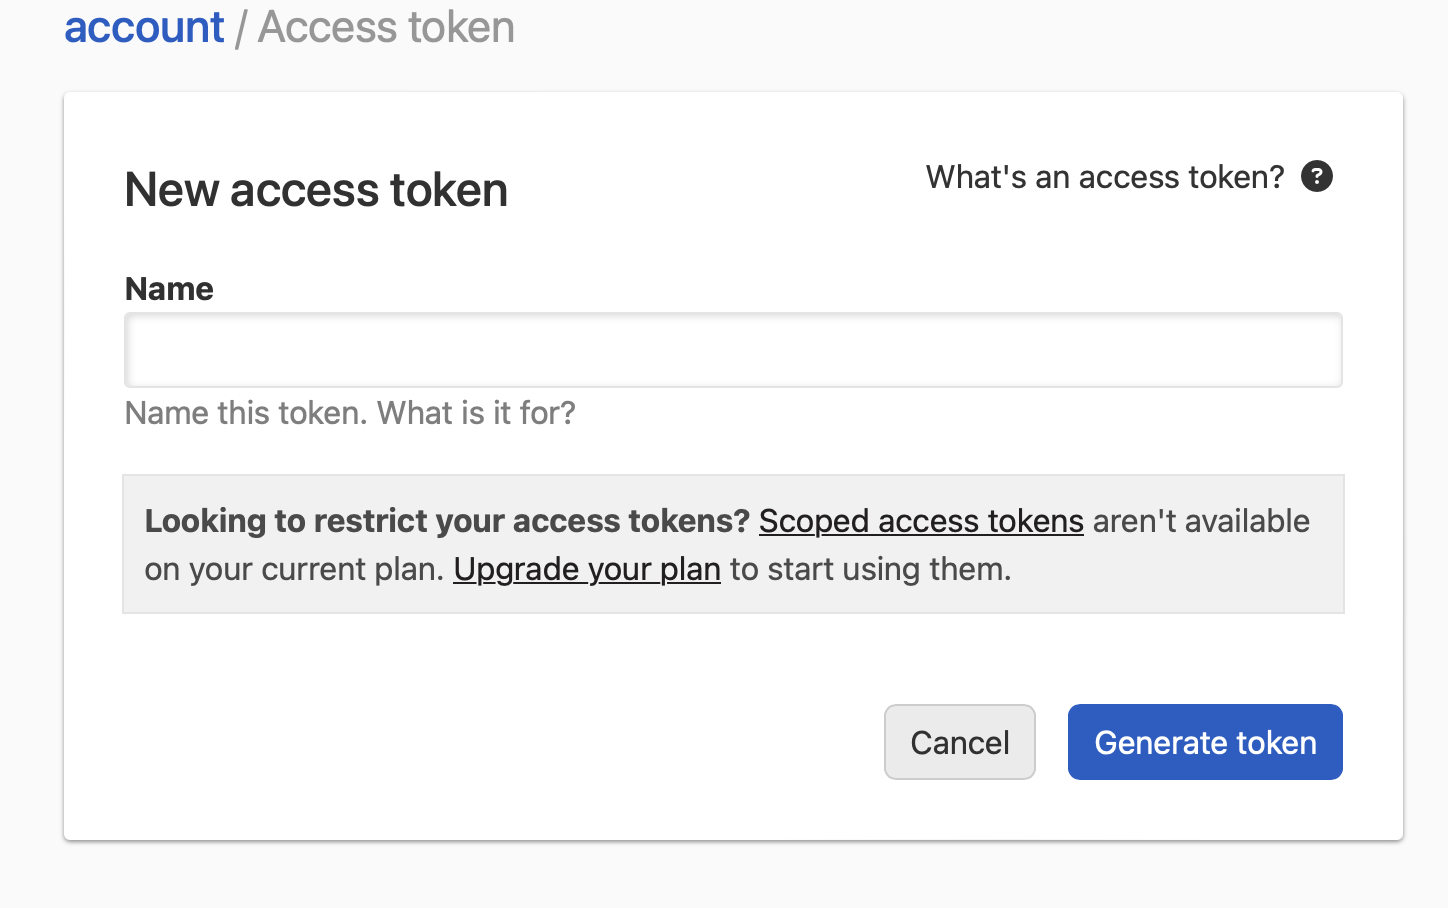
Generating an account access token
Note
To generate an account access token with fine-grained permission scopes, i.e. a scoped access token, you must be subscribed to an eligible plan.
Click Add to add a new access token.
When you create a new token, give it a name you can remember.
If you are subscribed to the Teams plan or higher, you can choose permission scopes for the token. If you are on the Solo plan, the token will have full permissions to all resources in the account.
Click Generate token to create the token after giving it a name.
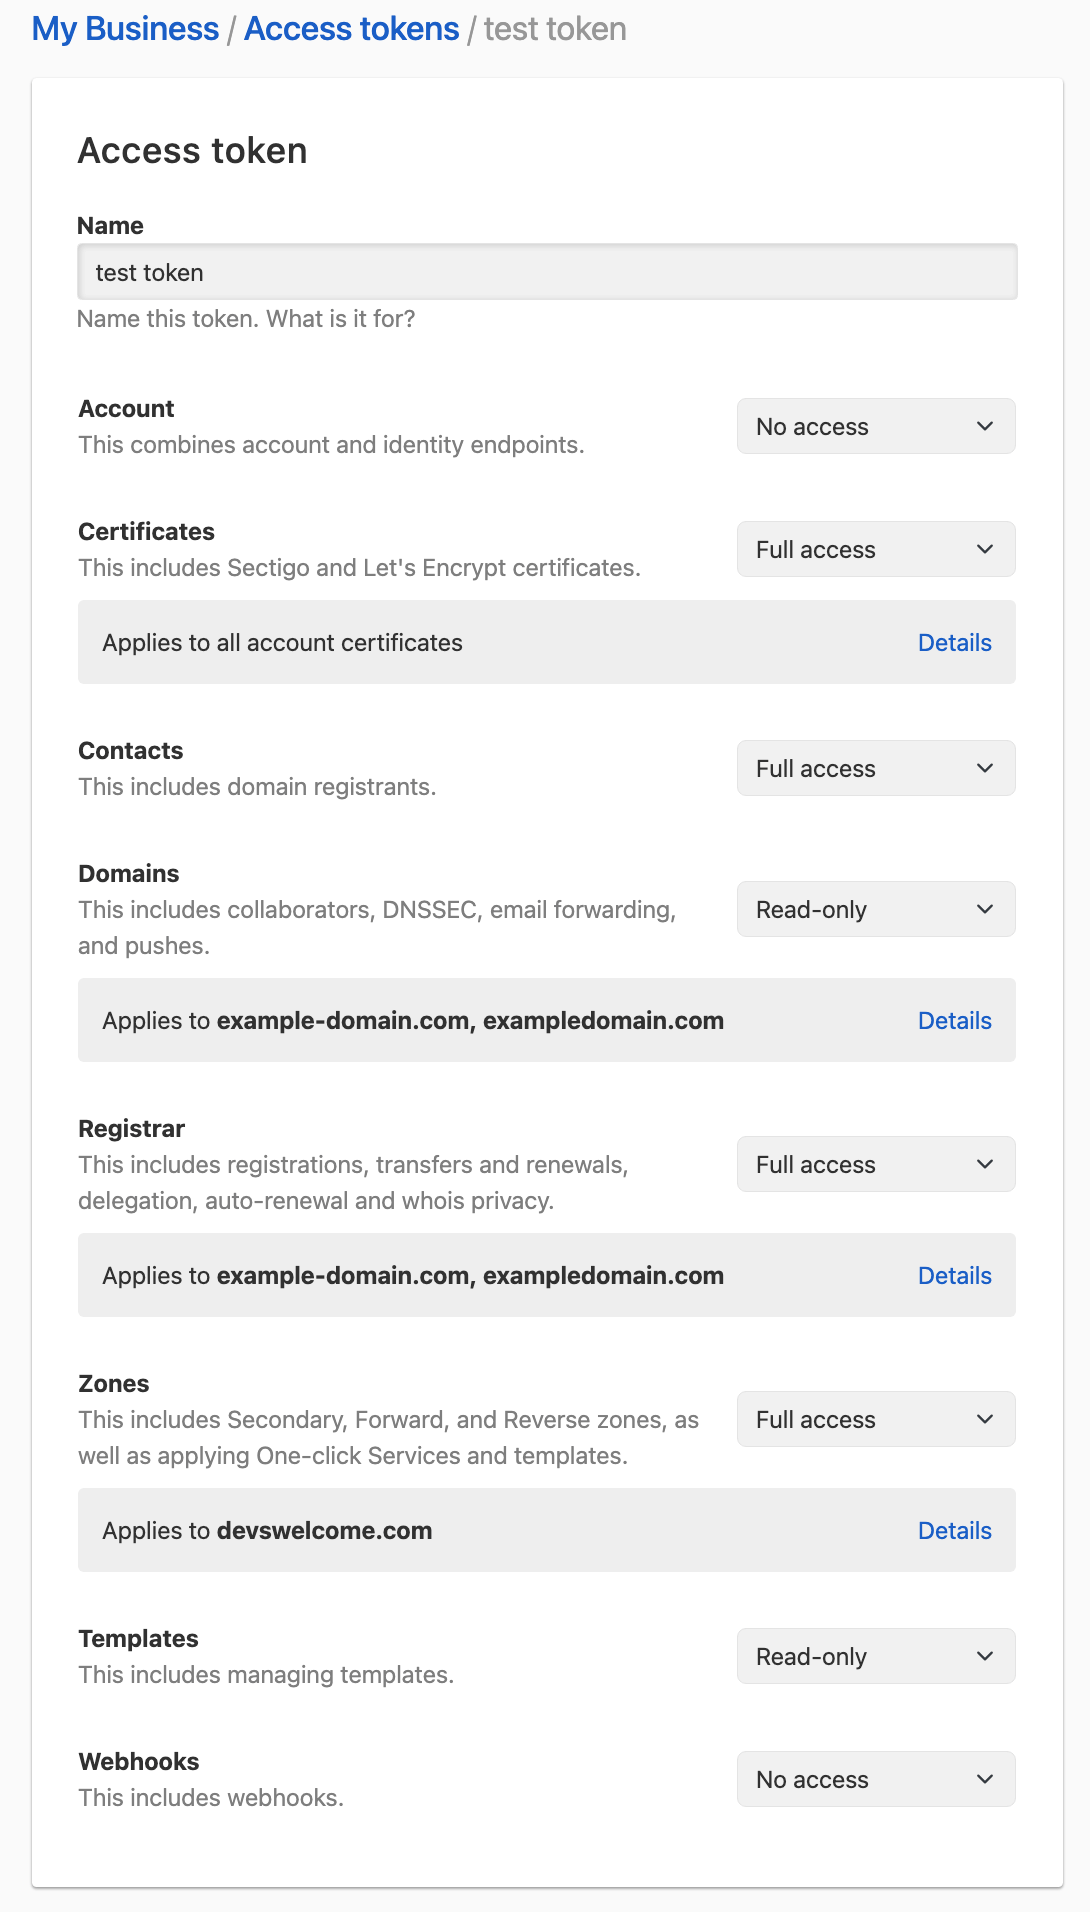
Selecting permission scopes
Scoped access tokens can be restricted to access only certain resources, or certain groups of resources, in an account. The type of access, i.e. read-only or full access, can also be specified. For instance, you can create an account access token with permissions for managing all the certificates for a given domain name or across all domain names. You can also create account access tokens with read-only permissions for specific zones.
When using a scoped access token with granular permissions (i.e., access to specific domains or zones rather than all), the API list endpoints (/domains and /zones) will return only the resources the token has access to.

Certificates, domains, registrar, and zones are resource types that allow restriction of access to specific resources.
For example, when configuring the token for access to zones, after choosing Read only or Full access from the dropdown, you can click Change to specify whether it should have access to all zones in the account or only selected zones.
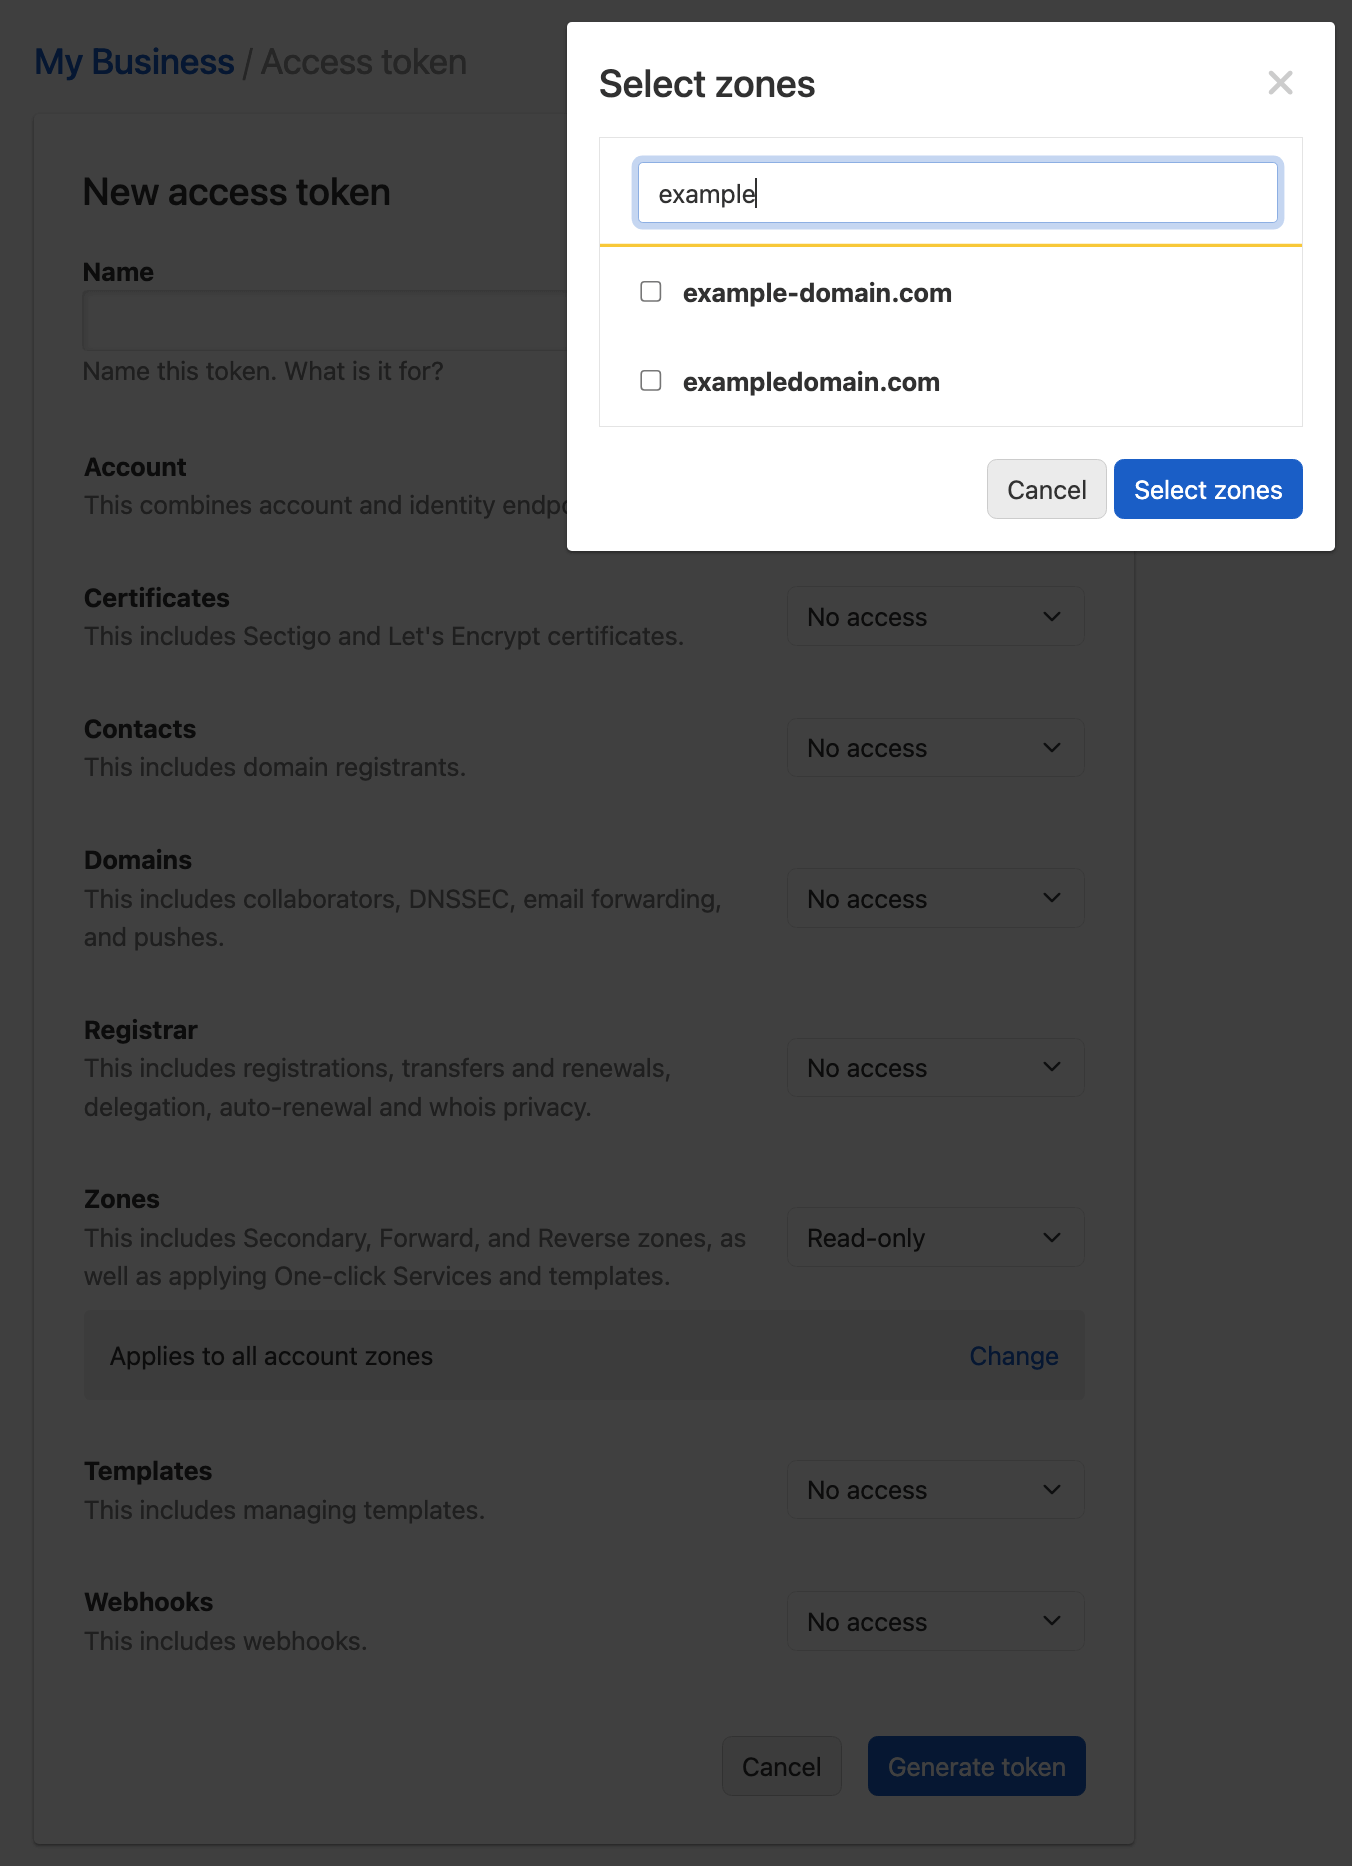
When you are finished with your selections, click Generate token to create the token.
Obtaining the generated access token
After clicking on Generate token, the generated access token will be displayed on the screen.
Copy the text for the access token – it will only be shown once.
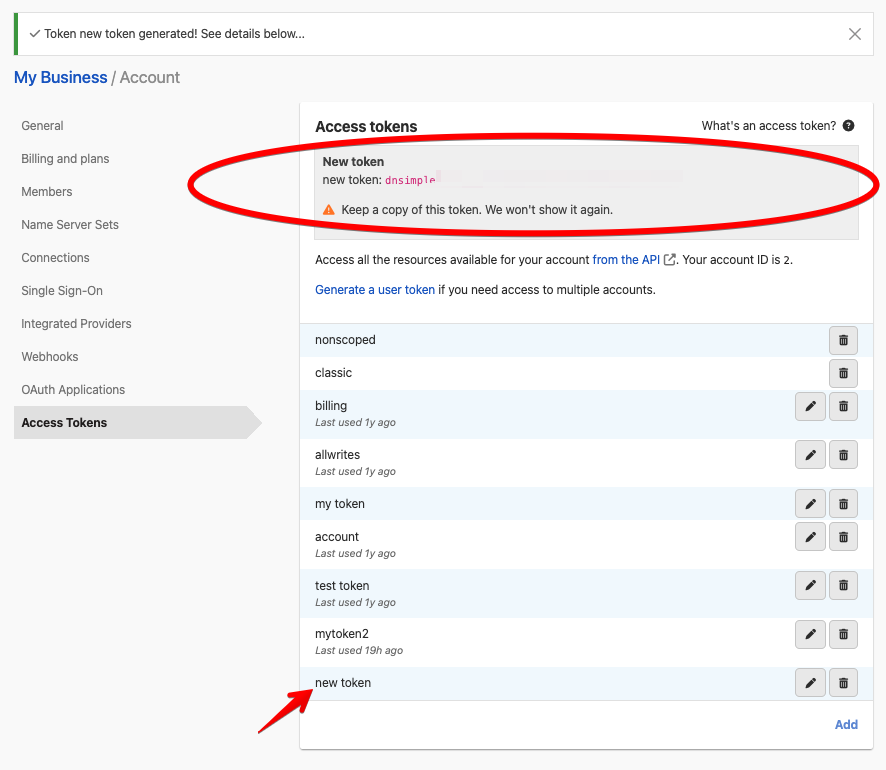
You can now access the API with this token using the HTTP header Authorization: Bearer {TOKEN}, replacing {TOKEN} with the value taken from the page when the token is generated. If you’d like additional information on how to access the API with the newly generated token, please visit the authentication section on the DNSimple Developer site.
Viewing and editing the permissions of a scoped access token
After an access token has been created, you can view and edit the permissions it was created with.
From the list of access tokens, click Edit on the access token you want to view.
You can then see what resources the token has access to and make changes to the permissions if needed.
When you are done editing the token permissions, click Update token to save the updated permissions to the token, or click Cancel to exit without making changes.
Removing an account access token
You can remove a token by clicking the trash can Delete icon on the desired token.
Have more questions?
If you have additional questions or need any assistance with API access tokens, just contact support, and we’ll be happy to help.