Google Domain Transfer Chrome Extension
Table of Contents
If you’ve decided to switch your domain management from Google Domains to DNSimple, our dedicated Google Domain Transfer Chrome Extension will make your transition as smooth as possible.
The Chrome Extension is engineered to streamline the entire domain transfer process, eliminating the need for manual data entry and minimizing room for errors. With a user-friendly interface, the extension walks you through each step of transferring your domain, ensuring you don’t miss any critical configurations or settings so you won’t experience any downtime during or after the transfer. From unlocking your domain at Google Domains to setting up DNS records in DNSimple, this tool aims to make the process quick, secure, and hassle-free.
In this support article, we guide you through the step-by-step process to install and use our Chrome Extension for transferring your domain from Google Domains to DNSimple.
Installing from the Chrome web store
Our Chrome extension has been published on the Chrome web store, and can be added with one click there.
- Visit our extension page
-
Click on the blue “Add to Chrome” button found at the far right of the top of the page.

Further instructions on managing your installed Chrome extensions can be found here.
Download link
Before proceeding with the installation, you’ll need to download the extension ZIP file. The file is hosted on Google Drive for easy access.
Click here to download the Domain Transfer to DNSimple Chrome Extension ZIP file.
Prerequisites
Before starting the installation process, download the ZIP file containing the extension. You will also need access to your Google Domains account and should have a DNSimple account created. This guide covers installation for browsers that support Chrome Extensions: Google Chrome, Brave, and Microsoft Edge.
For Google Chrome users
-
Unzip the file: Locate the downloaded ZIP file on your computer and unzip it into a folder.
-
Open Chrome Extensions page: Open Google Chrome and go to
chrome://extensions/.
-
Enable developer mode: Toggle the
Developer modeswitch on, located at the top-right corner of the Extensions page.
-
Load unpacked extension: Click the
Load unpackedbutton and navigate to the folder where you unzipped the extension files. Select the folder and clickOpen.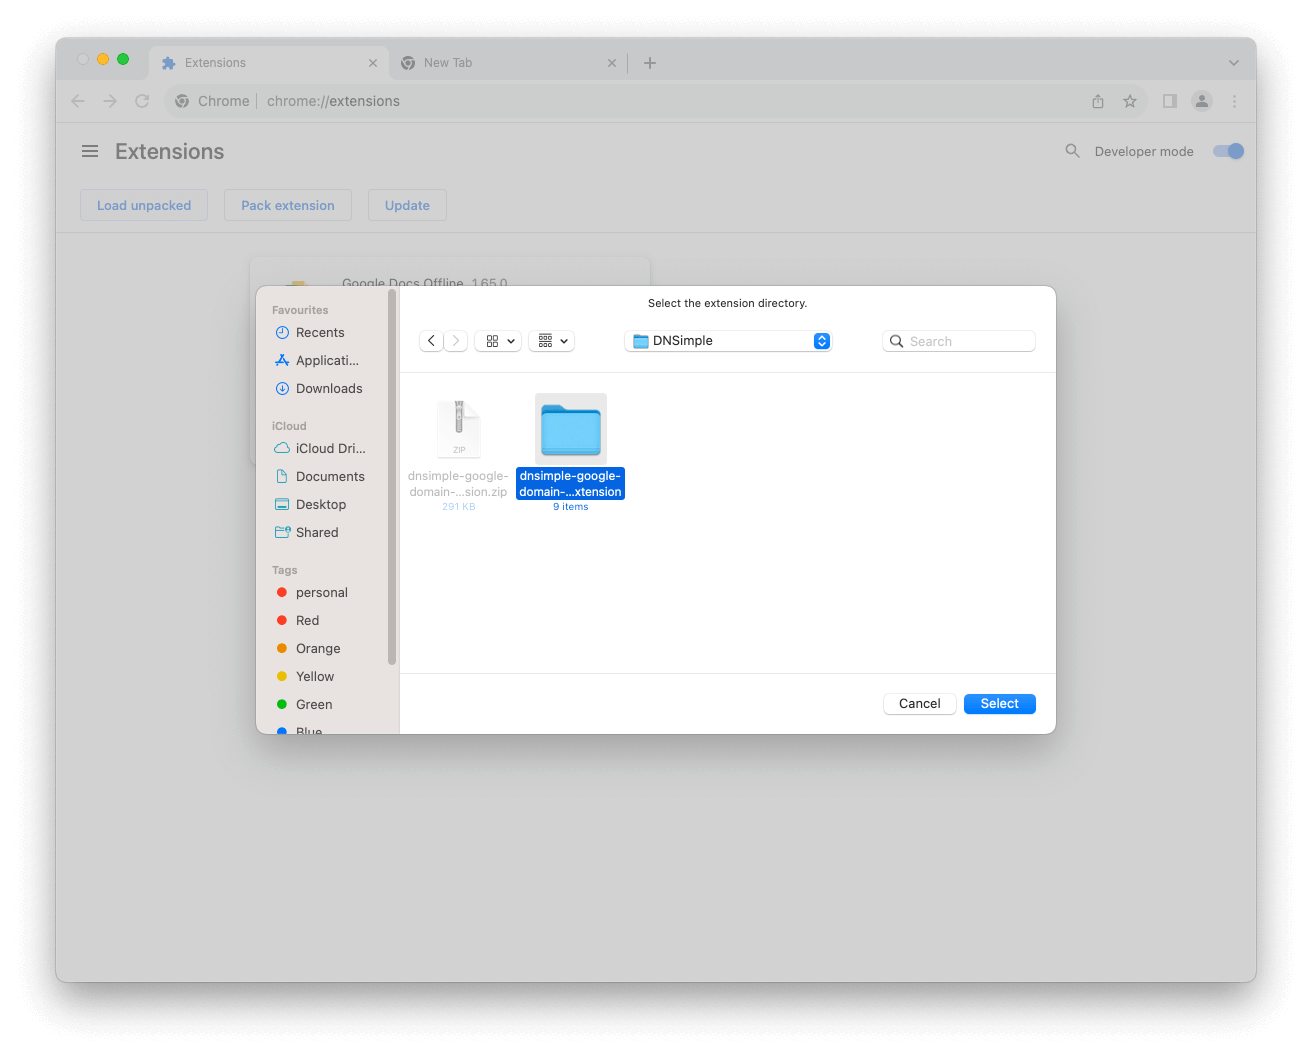
-
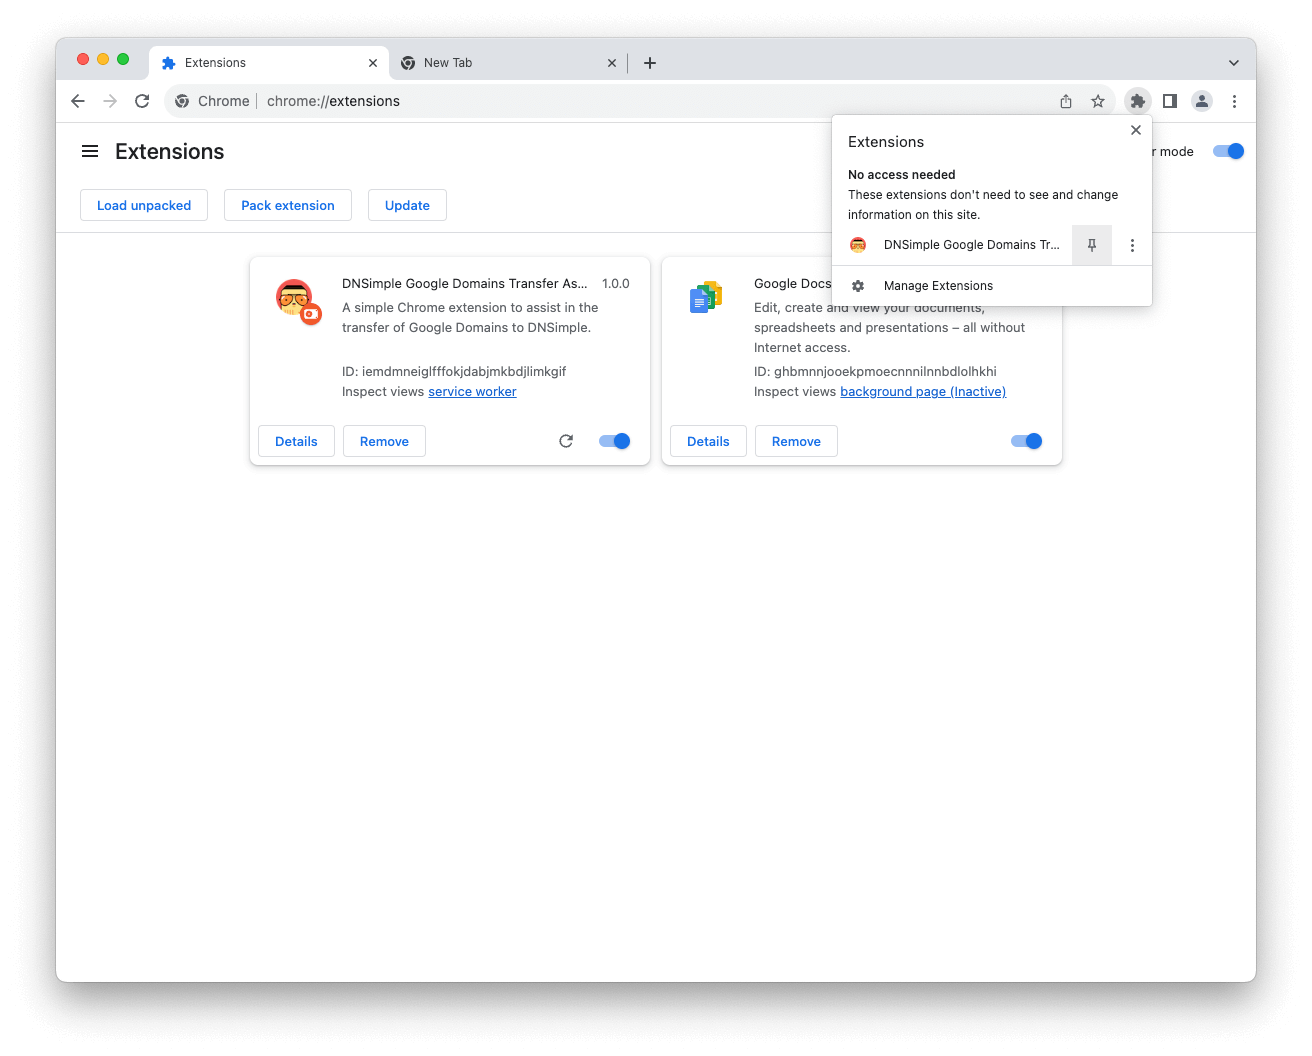
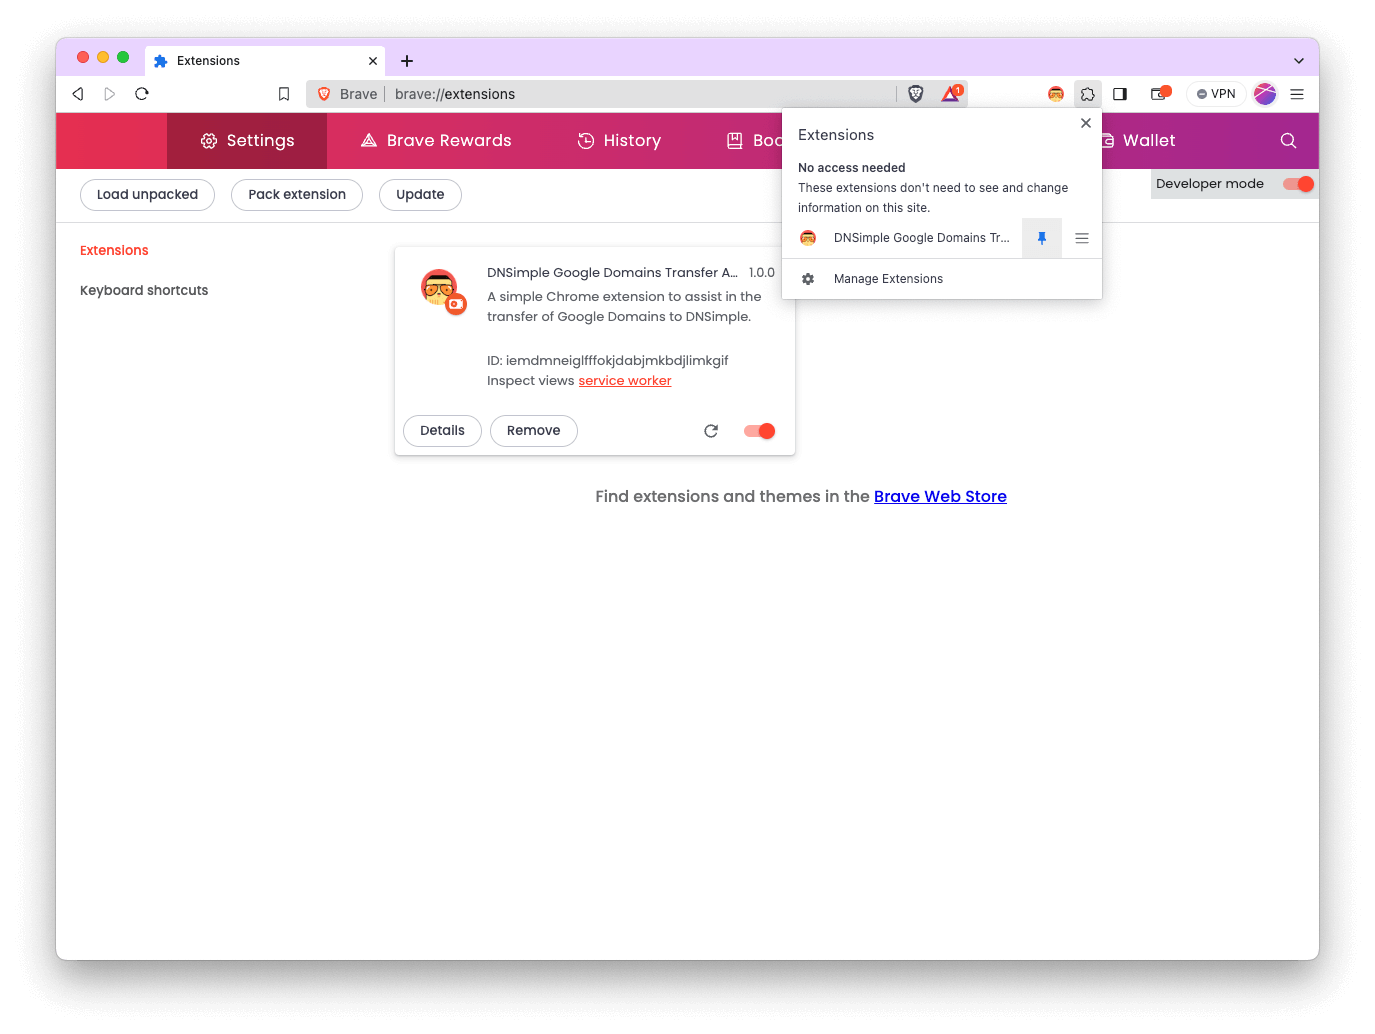
Verify installation: You should now see the Domain Transfer to DNSimple extension icon next to your address bar.
For Brave users
-
Unzip the File: Locate the downloaded ZIP file on your computer and unzip it into a folder.
-
Navigate to extensions: Open Brave and type
brave://extensions/into the address bar.
-
Enable developer mode: Toggle the
Developer modeswitch on, located at the top-right corner of the Extensions page.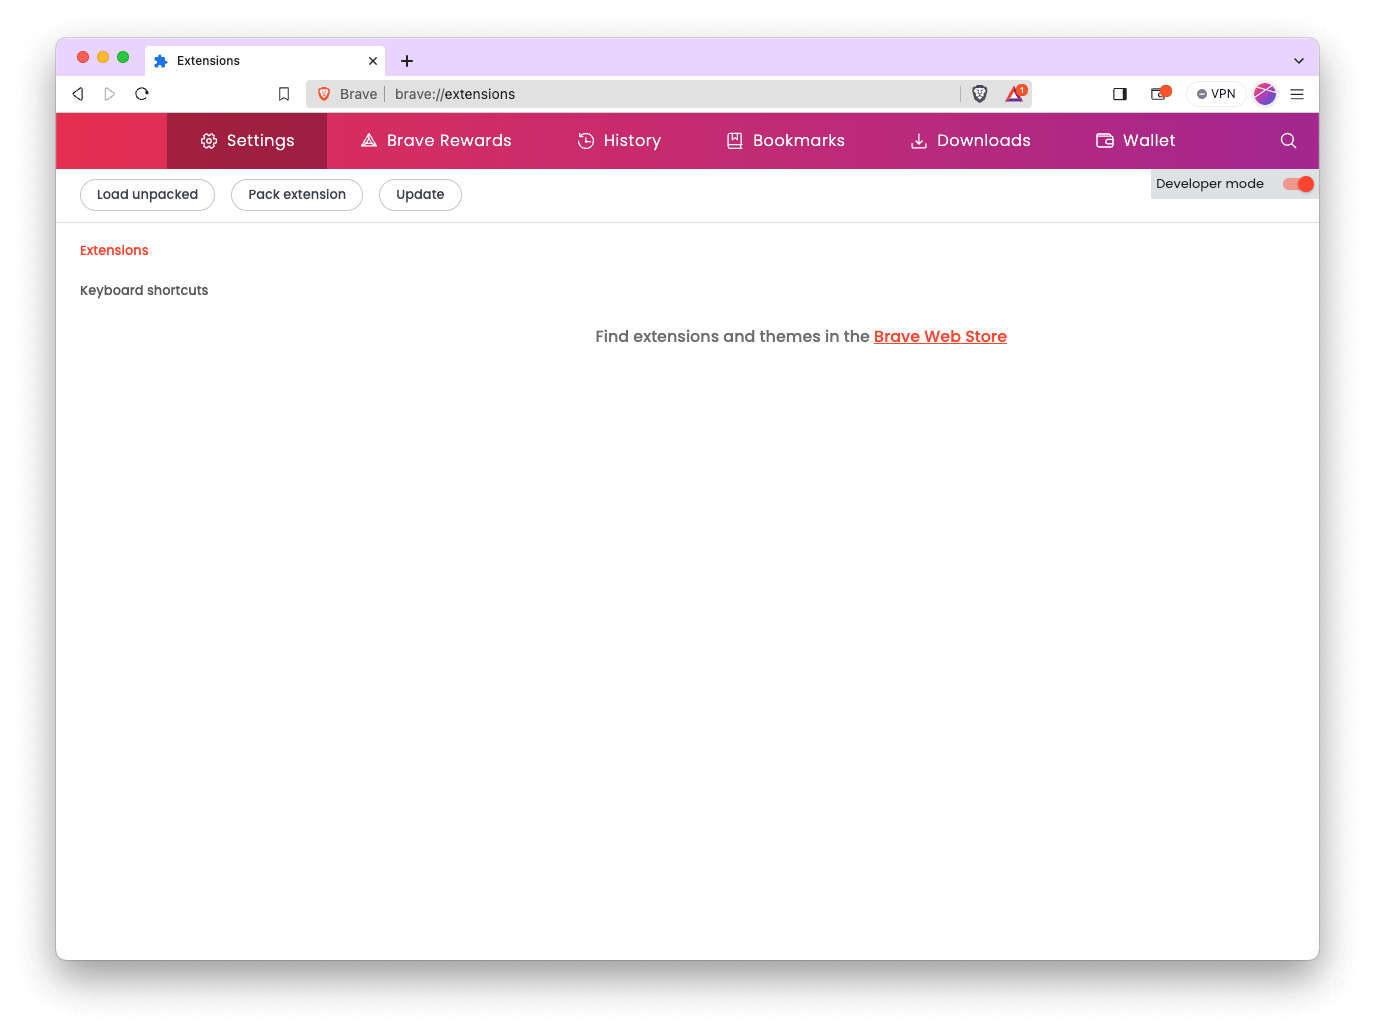
-
Load unpacked extension: Click the
Load unpackedbutton and navigate to the folder where you unzipped the extension files. Select the folder and clickOpen.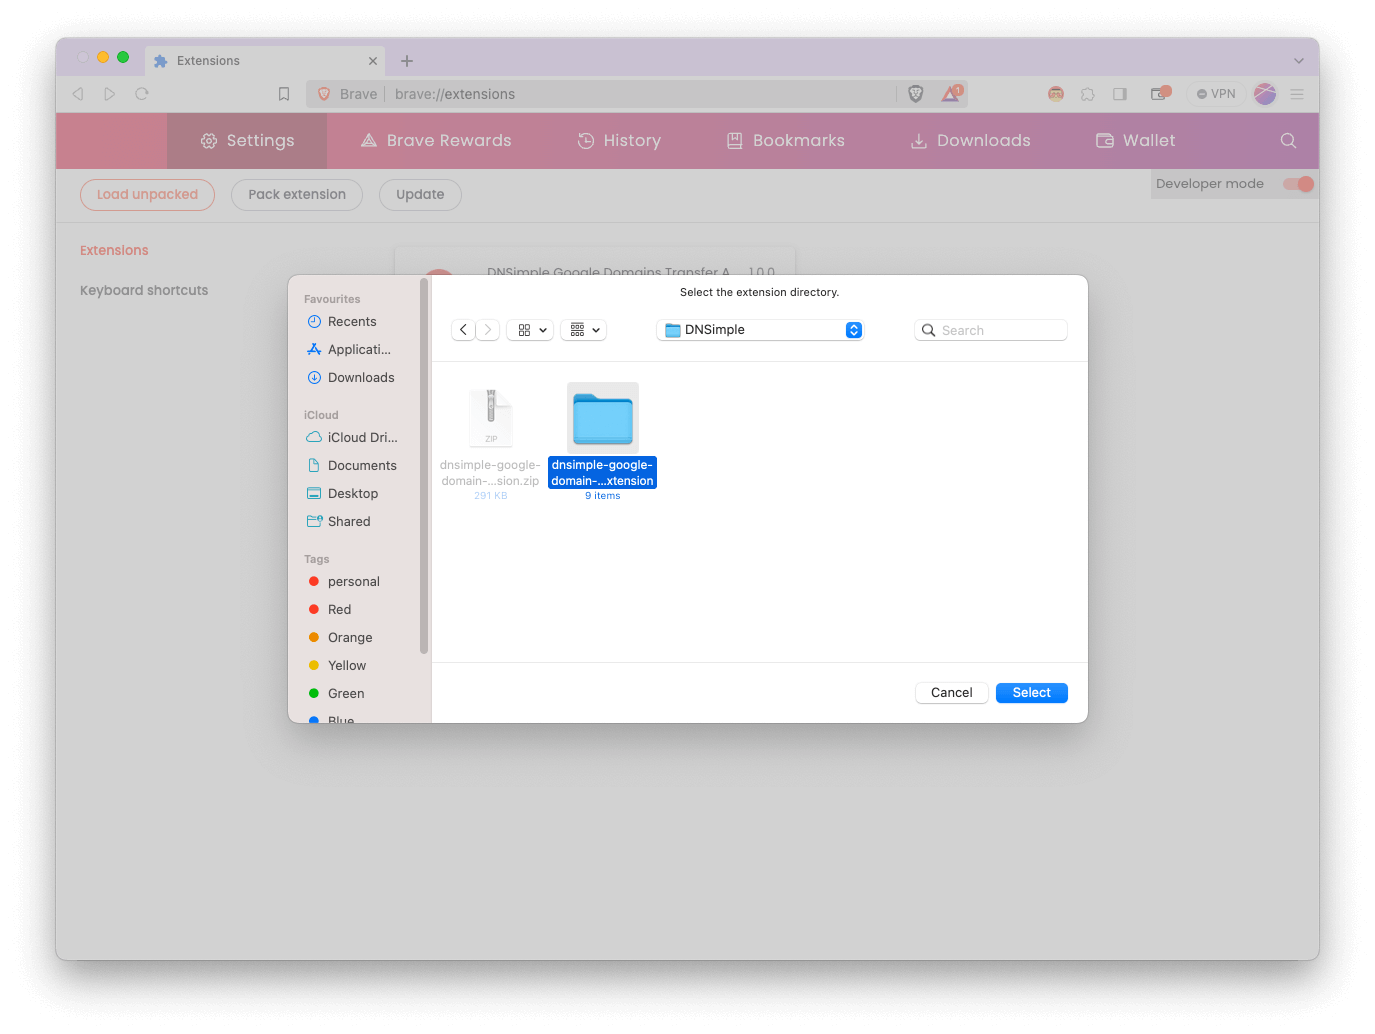
-
Verify installation: You should now see the Domain Transfer to DNSimple extension icon next to your address bar.
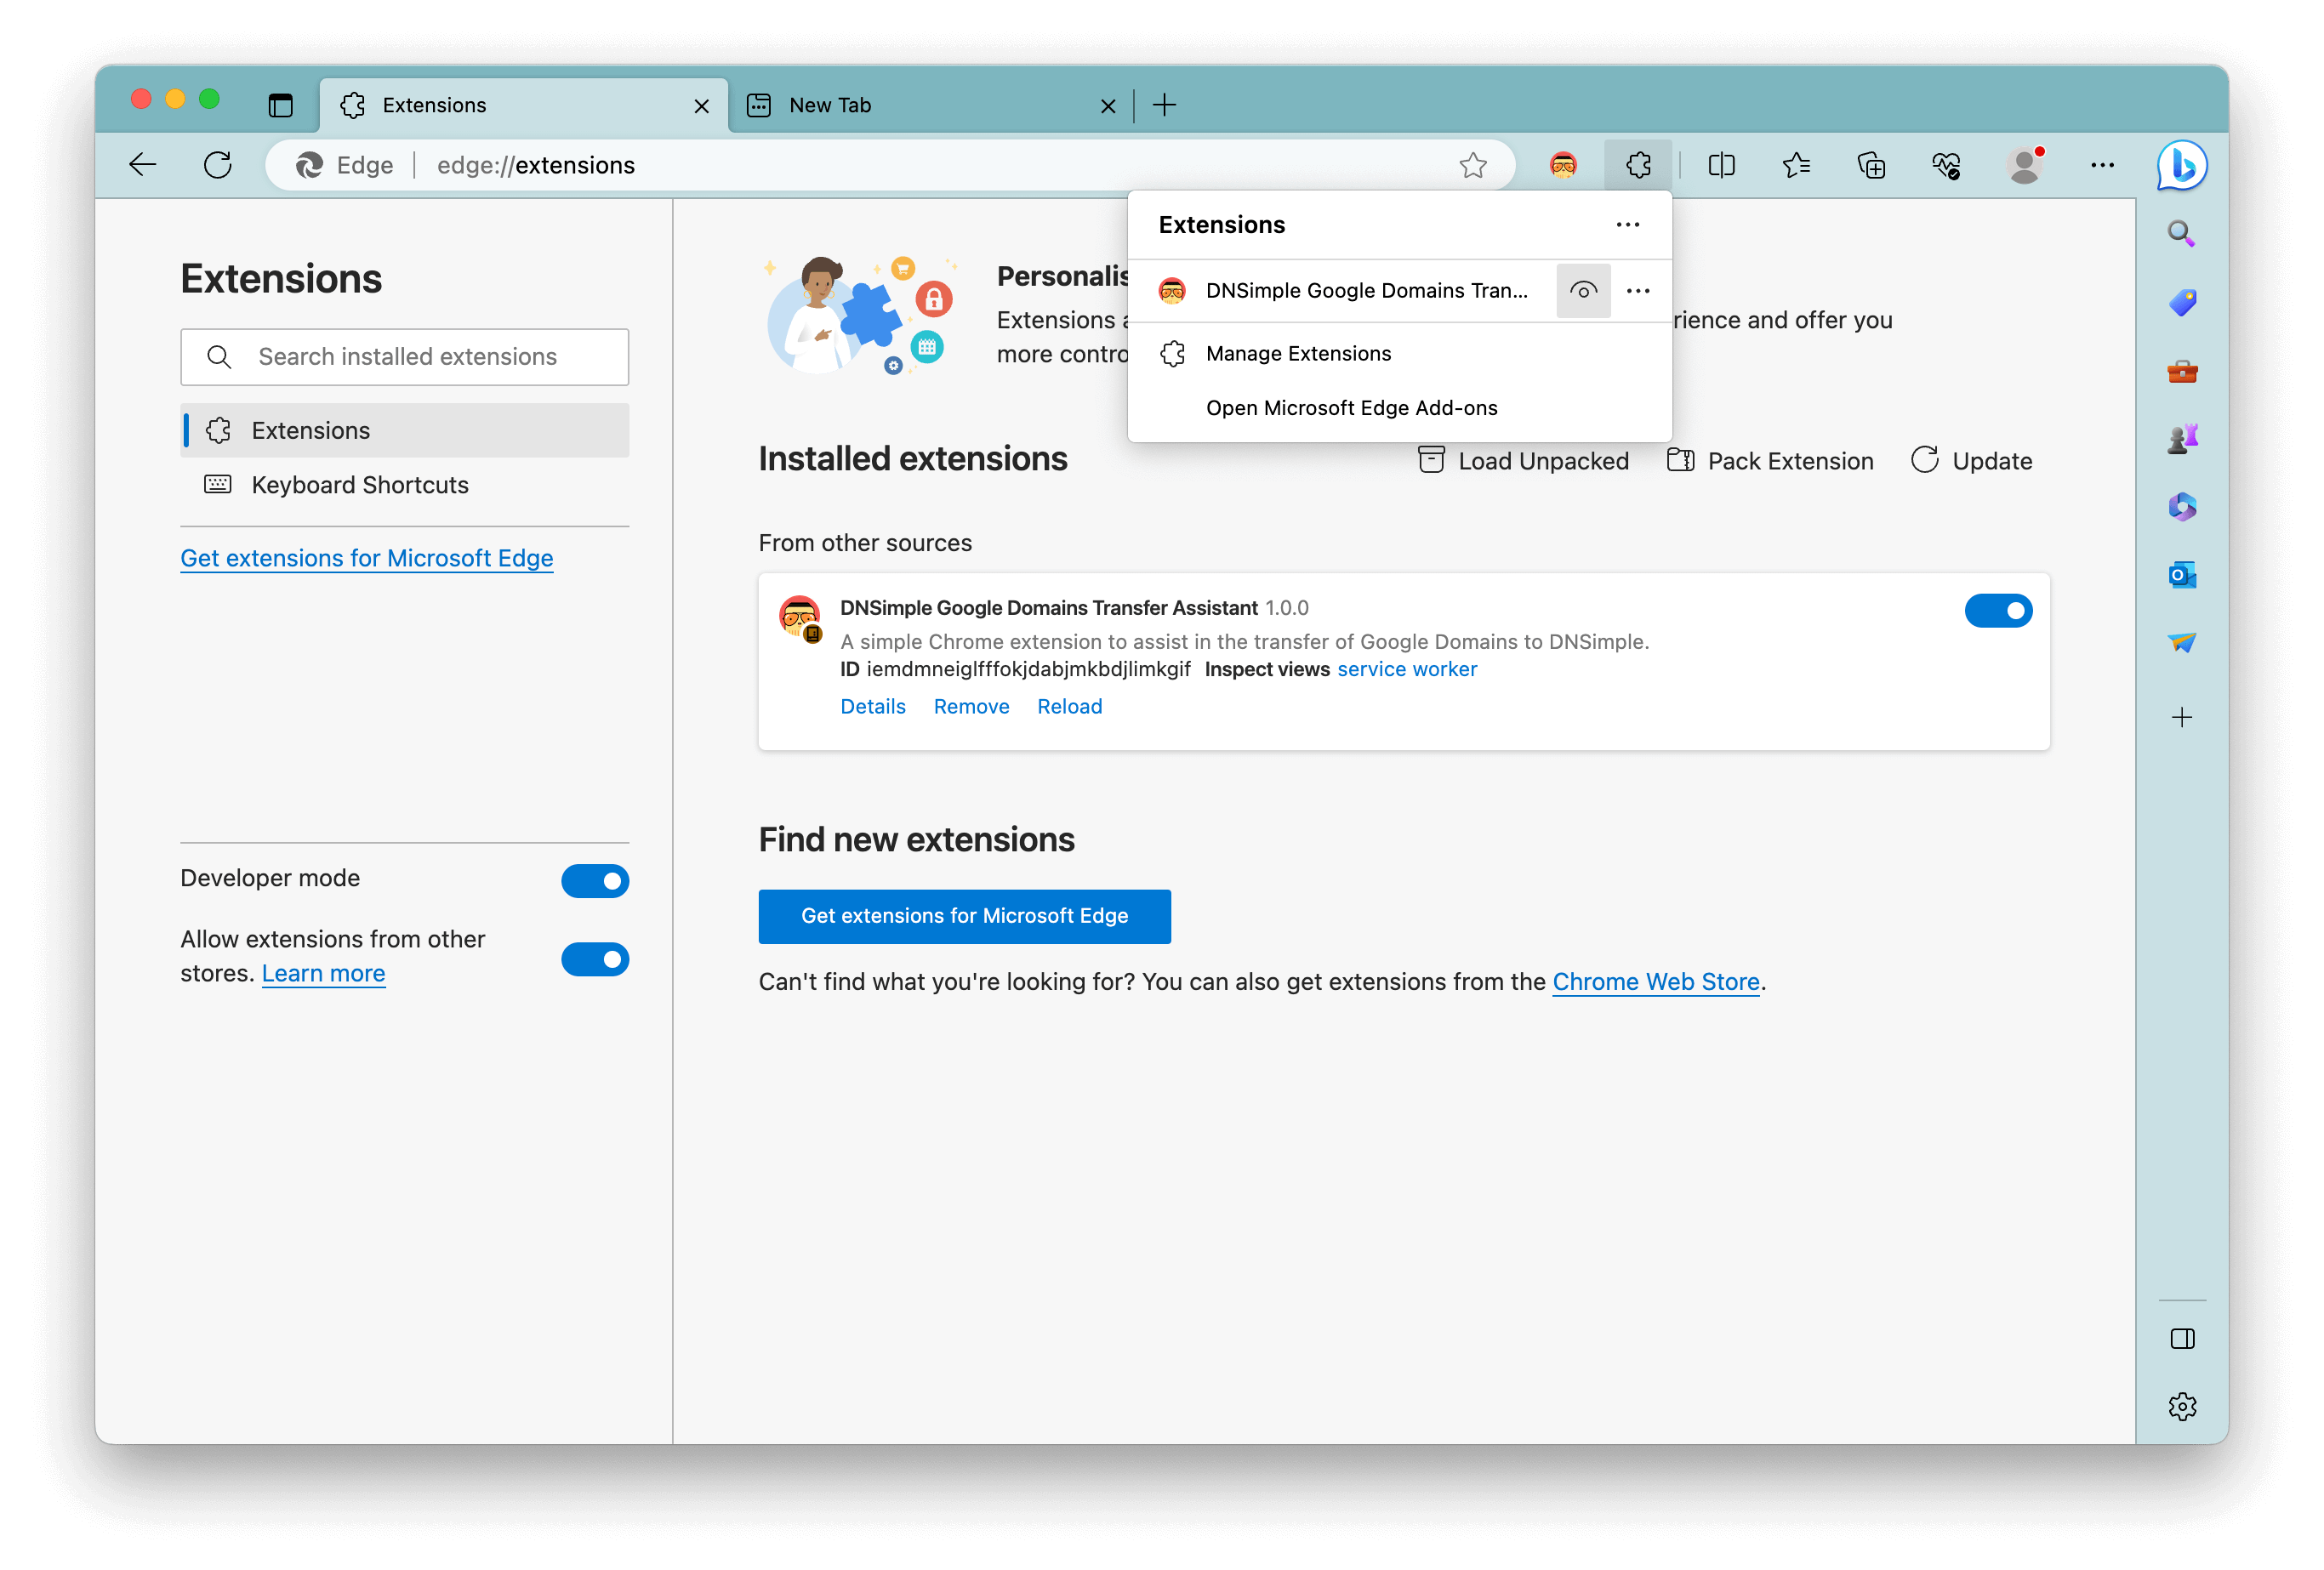
For Microsoft Edge users
-
Unzip the file: Locate the downloaded ZIP file on your computer and unzip it into a folder.
-
Navigate to extensions: Open Edge and type
edge://extensions/into the address bar.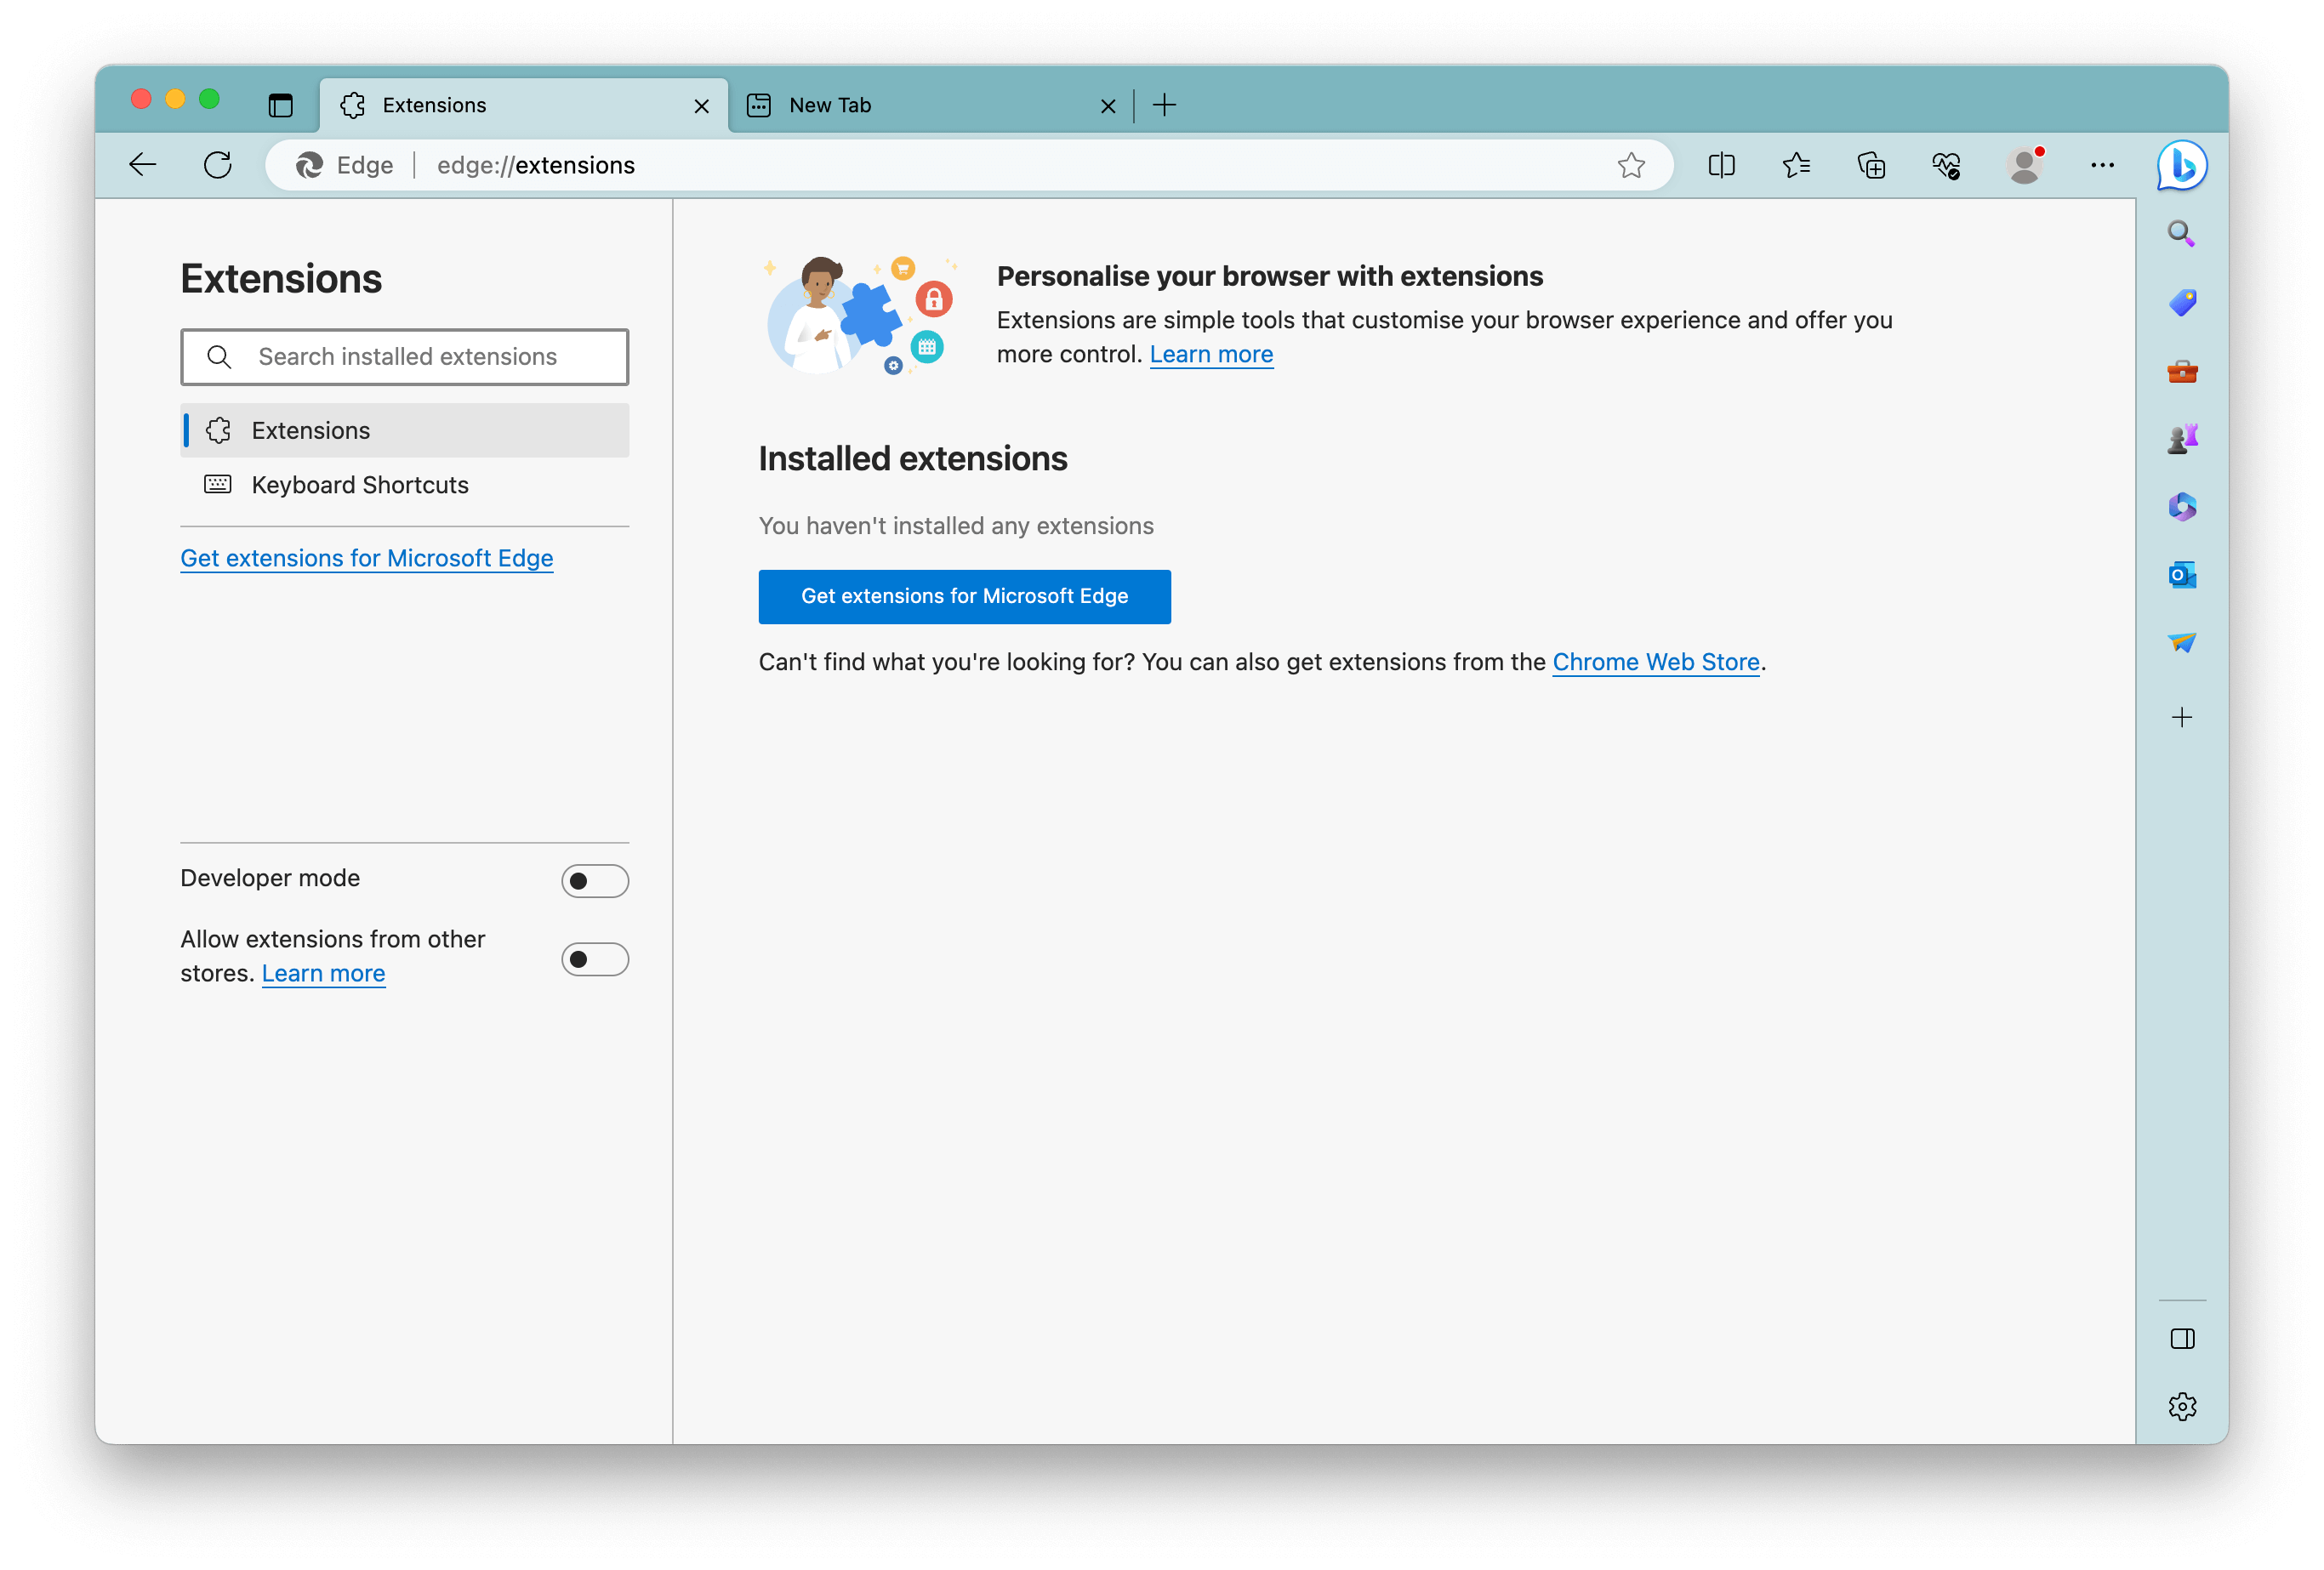
-
Allow extensions from other stores: Click the
Allow extensions from other storesbutton at the bottom-left corner of the Extensions page.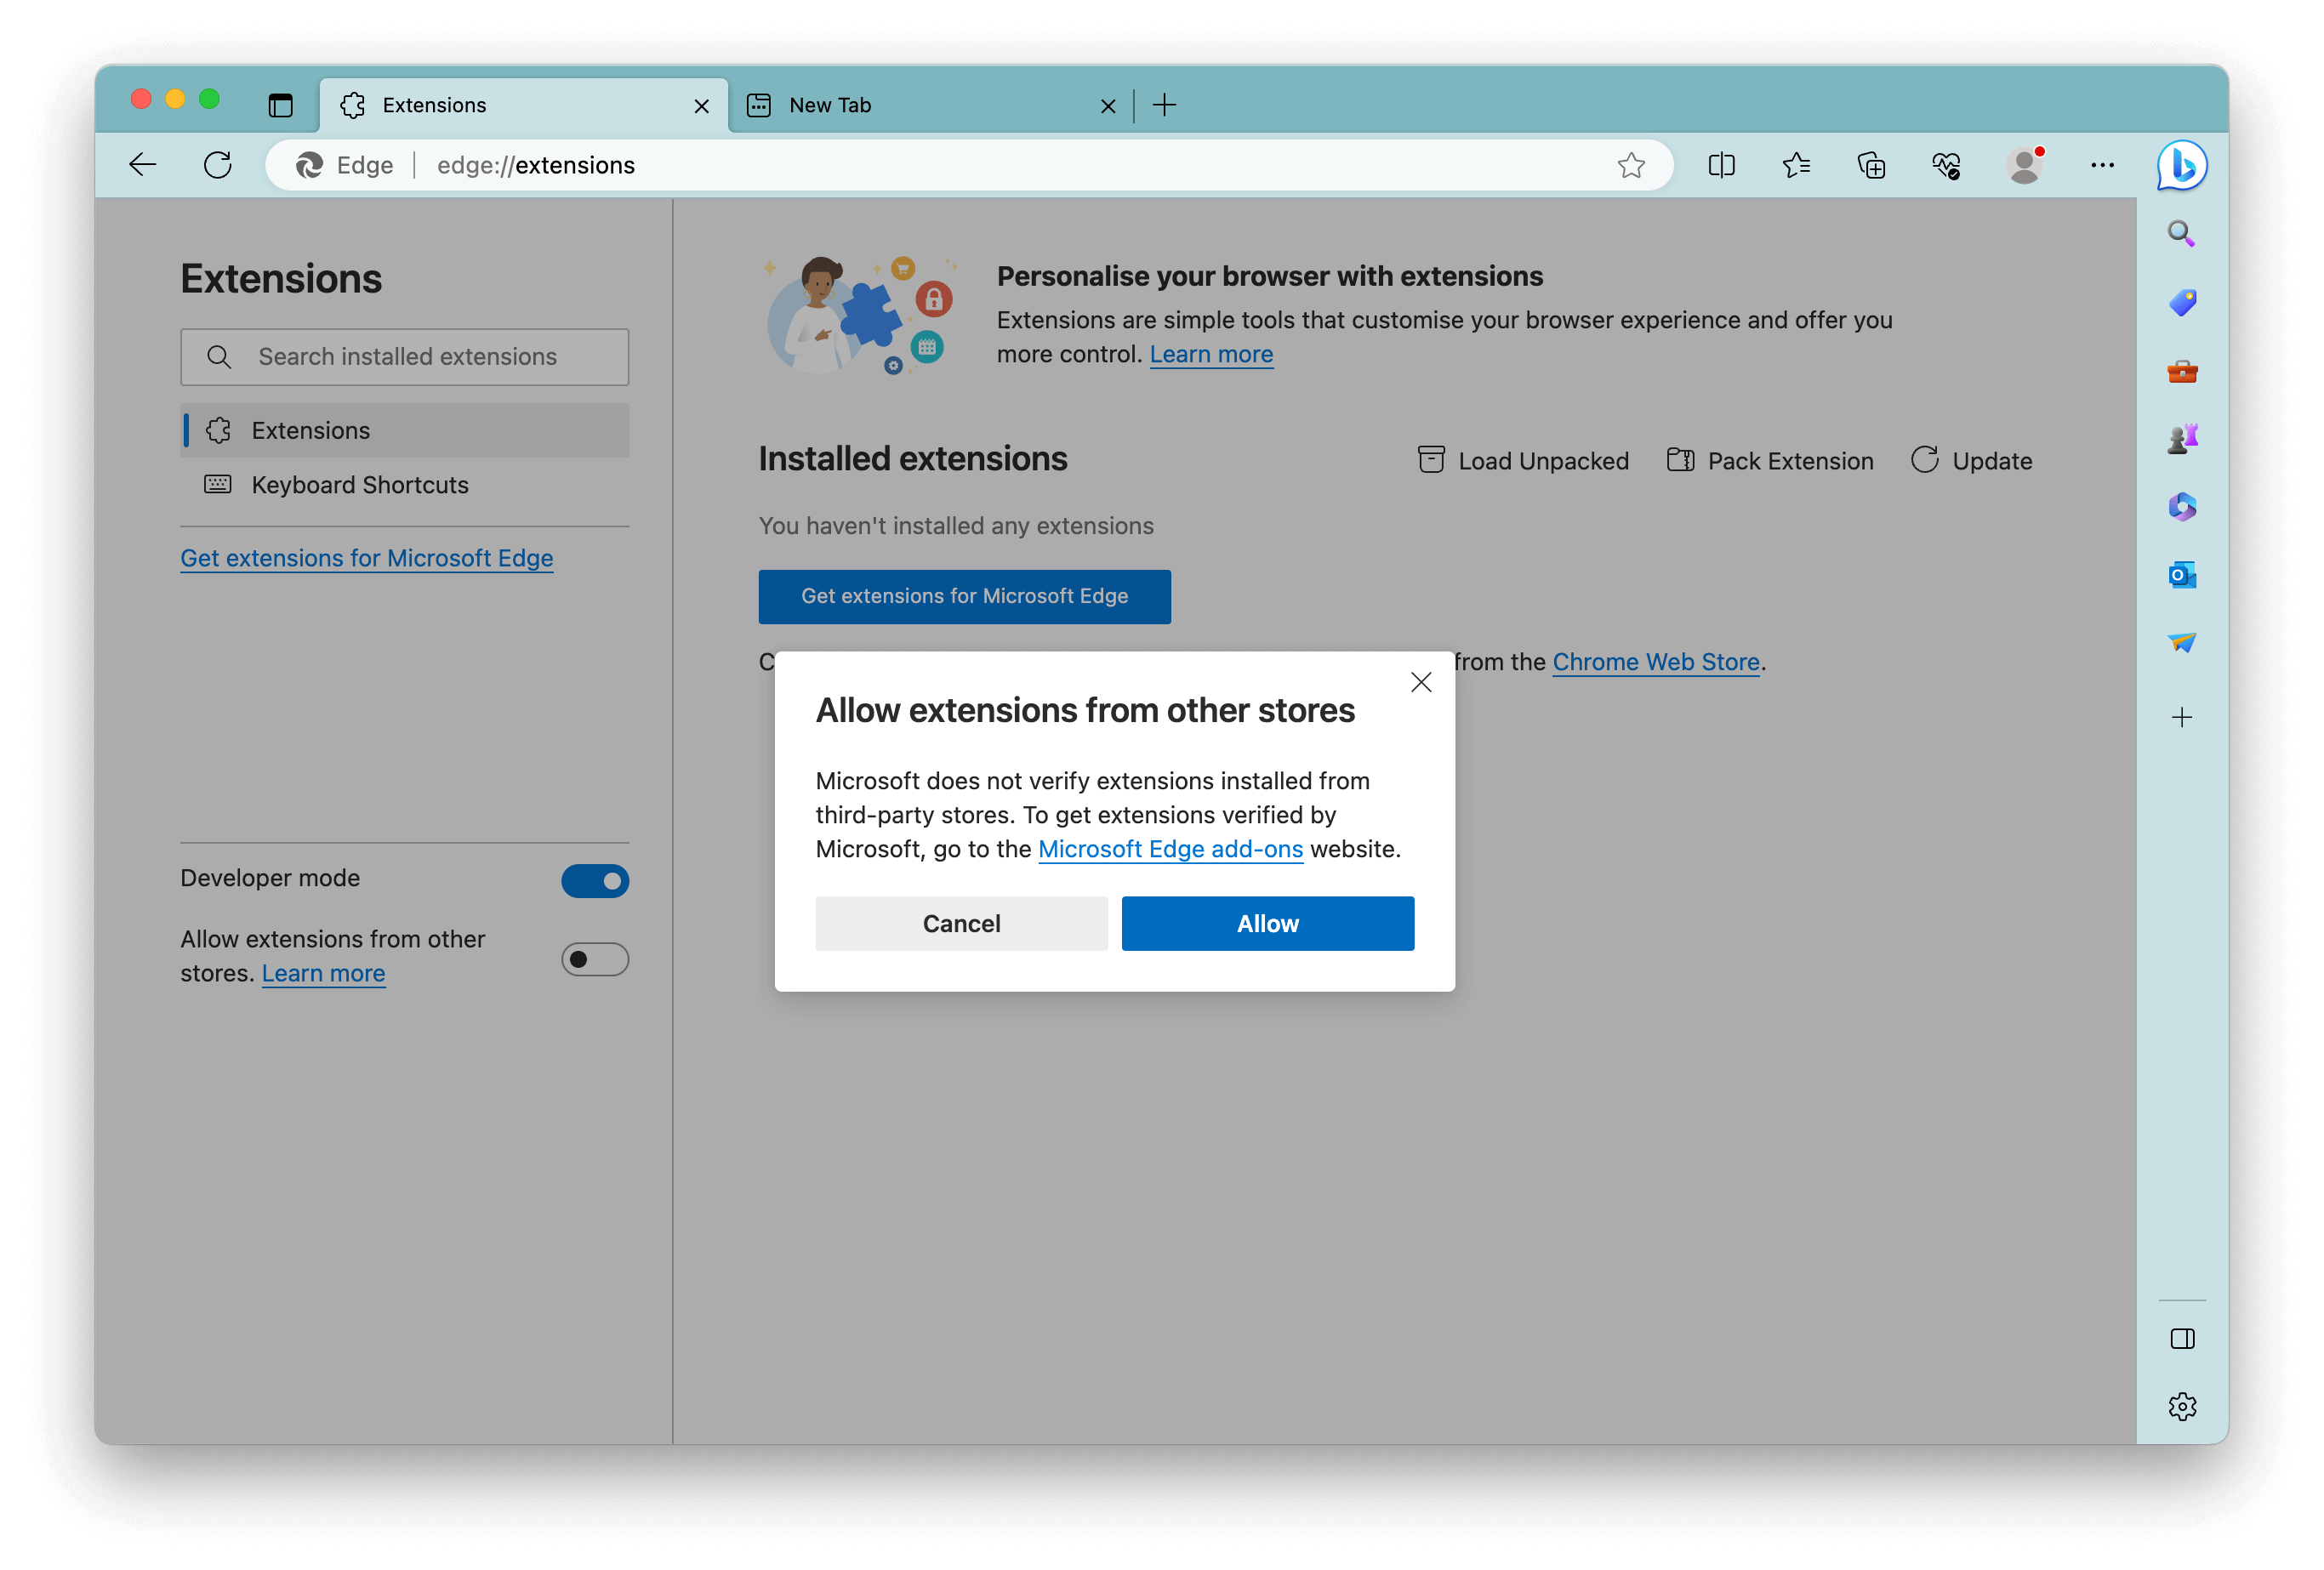
-
Enable developer mode: Toggle the
Developer modeswitch on, located at the top-right corner of the Extensions page.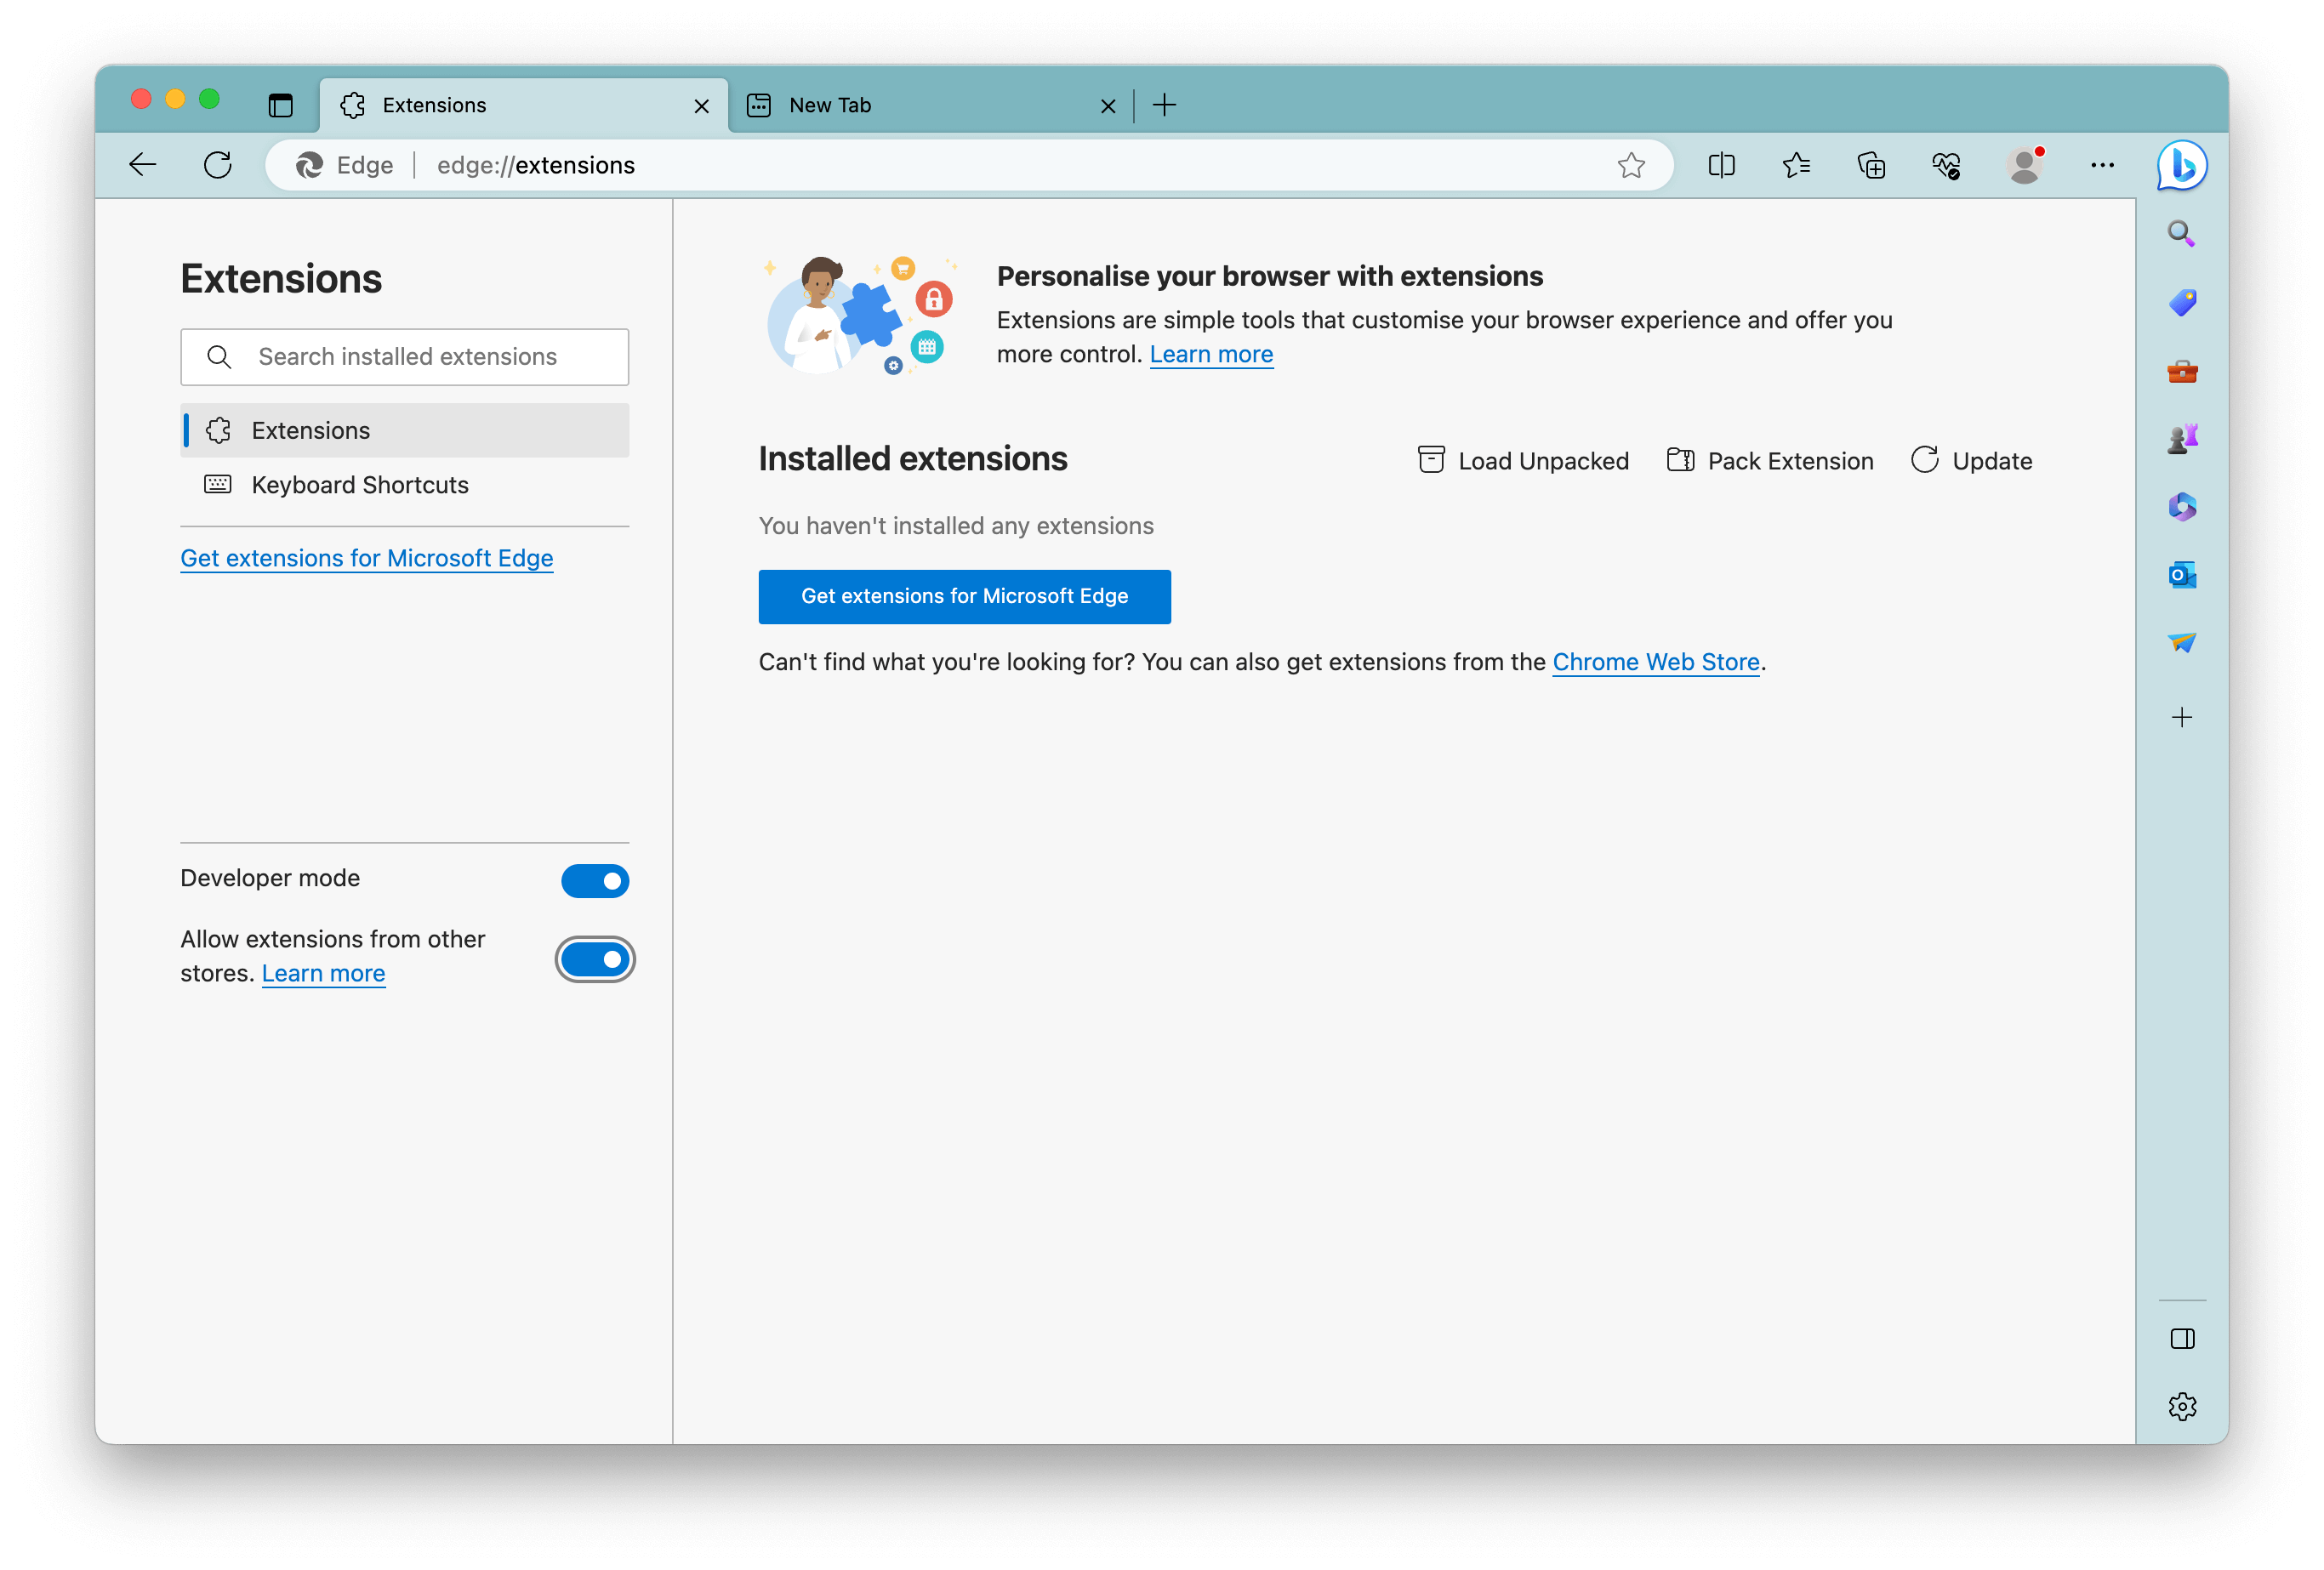
-
Load unpacked extension: Click the
Load unpackedbutton and navigate to the folder where you unzipped the extension files. Select the folder and clickOpen.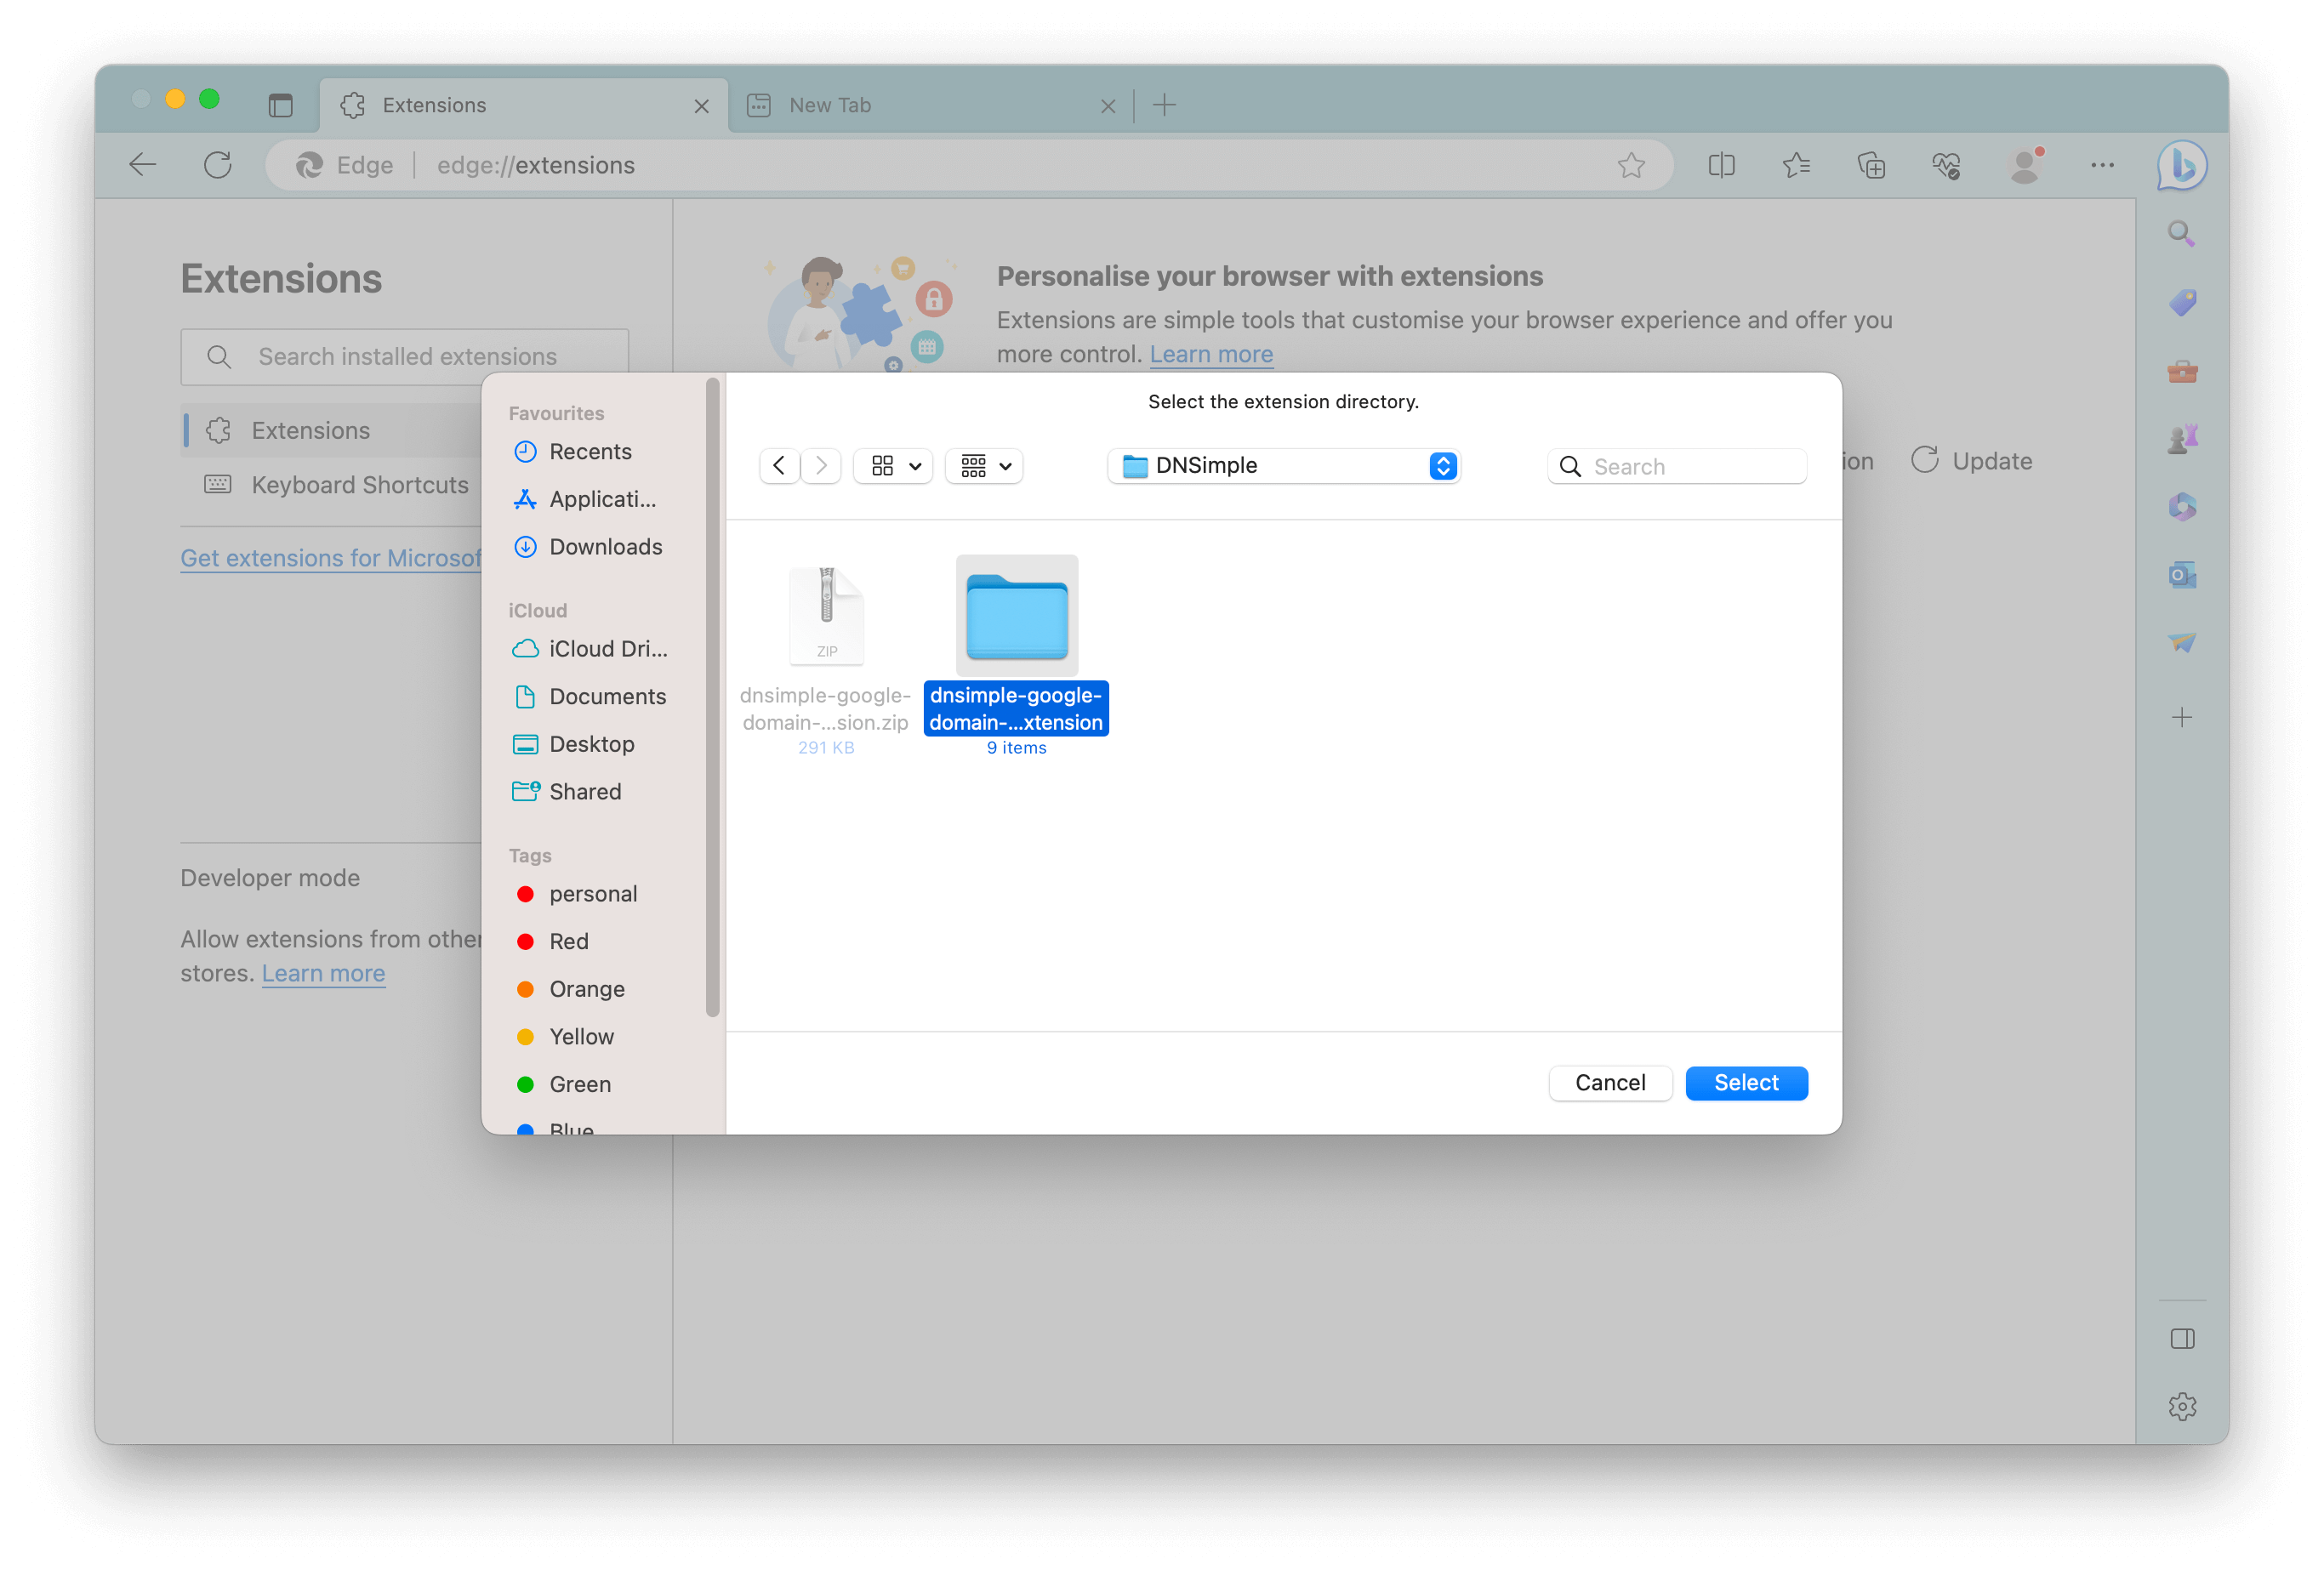
-
Verify installation: You should now see the Domain Transfer to DNSimple extension icon next to your address bar.
Now that you’ve successfully installed the extension from a ZIP file, you can initiate the domain transfer from Google Domains to DNSimple. Proceed to the next section for detailed instructions on how to make the transfer.
Using the Chrome Extension
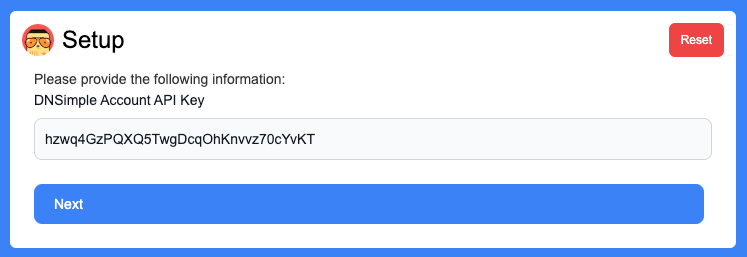
Setup
The first time you open the extension, you will be prompted to enter your DNSimple API token. This token is used to authenticate your DNSimple account and allows the extension to make changes to your account on your behalf. If you don’t have an API token, create one by following the instructions in our API Access Token support article.
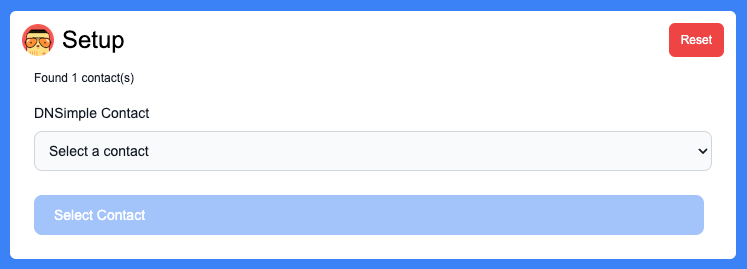
Once you have entered your API token, click Next. You will be taken to another screen where you will be asked to select the contact you want to use for the domain transfer. If you don’t have a contact created, create one by following the instructions in our Managing your contacts support article.
Load your domains
Once you have selected a contact, you will be taken to the main screen of the extension. Before you click Get Domains, make sure you are on the Google Domains main page https://domains.google.com/registrar, otherwise the extension will not be able to load your domains. Click the Get Domains button to load all the domains on the current page. You will see a list of all your domains, along with two options Action Required and Discard.
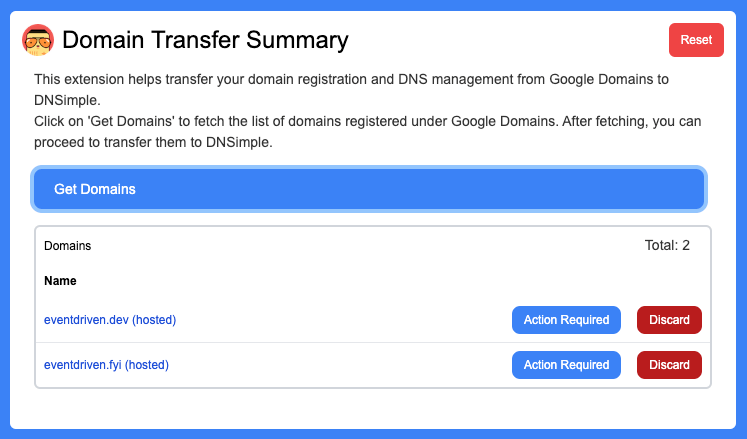
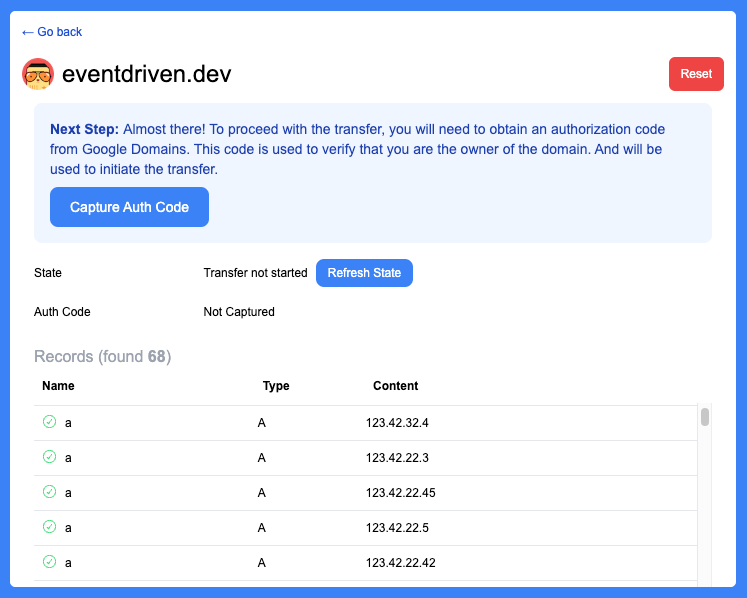
Transfer your domain
The Action Required button will take you to the domain page in the extension. You will see the current status of the domain and instructions for the next steps to transfer the domain. The extension will guide you through the entire process, from unlocking your domain to setting up the DNS records in DNSimple. Once you have completed all the steps, click Begin Transfer to initiate the transfer.