Managing Seats
Table of Contents
- Overview
- Increasing the number of seats
- Decreasing the number of seats
- Inviting new members
- Automatic Seat Allocation with Single Sign-On (SSO) Providers:
- Have more questions?
Overview
Note
Account seats for additional team members are only available on Teams or Enterprise plans.
The Teams plan includes one seat at no additional cost, allowing you to have one member actively involved in domain management. Any seats beyond the initial one will incur extra costs. Enterprise plans have custom pricing and seat numbers. See our pricing page for more details.
A DNSimple account can be associated with one or more users. When you add someone to an account as a member, you will have the option to set their level of access to full access (access to all resources inside an account) or limited access (specific to each domain). The members will retain their unique login credentials and multi-factor authentication configuration.
Increasing the number of seats
To increase the number of seats, follow these steps:
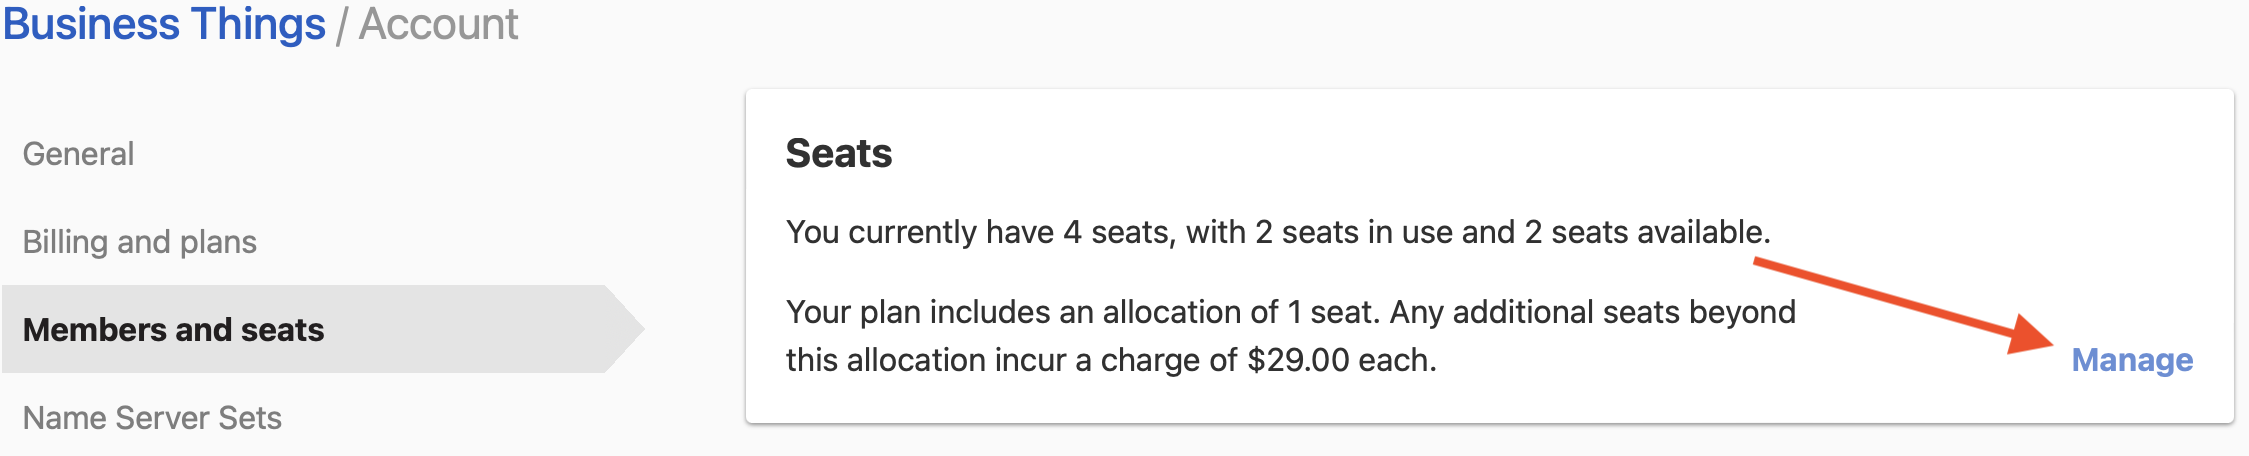
- Navigate to your account settings.
- Select the Member and seats tab.
-
Click Manage within the Seats card.
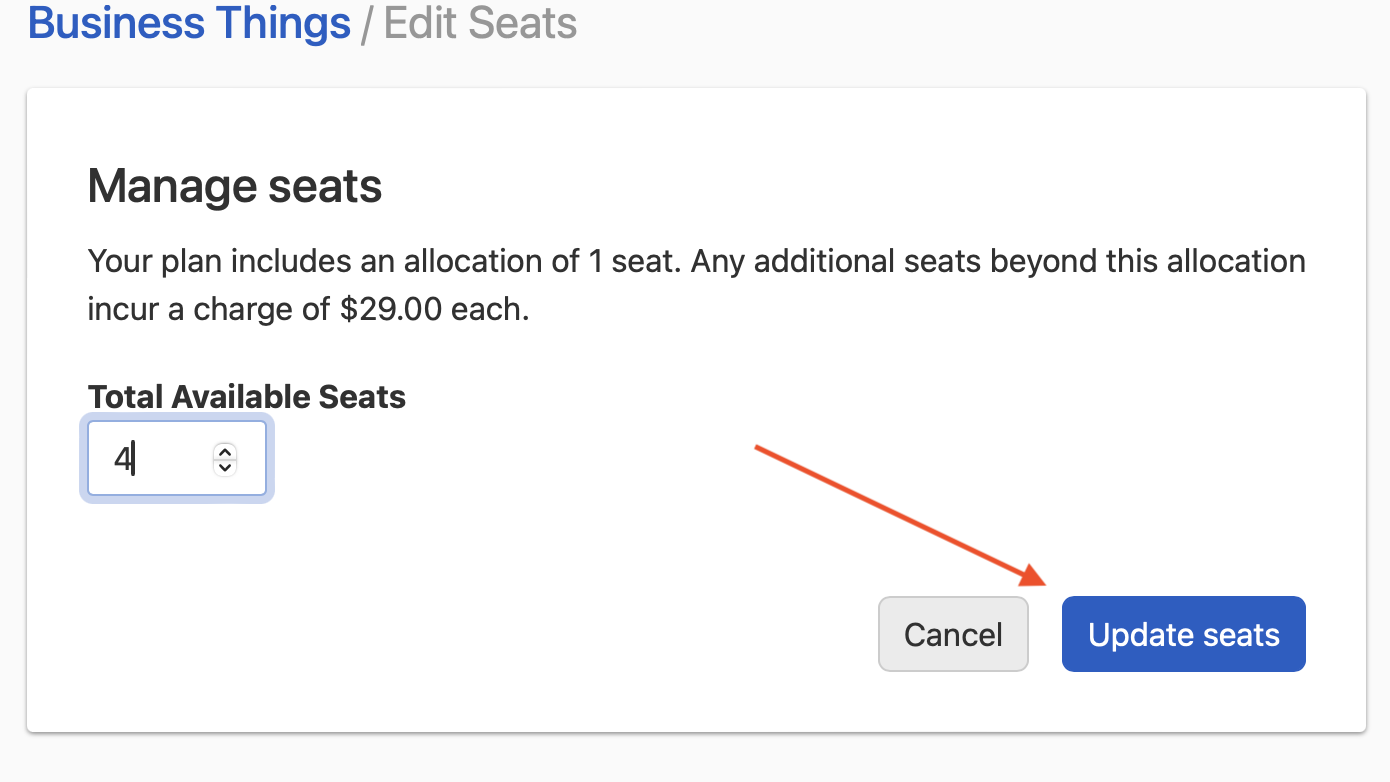
- Choose the desired number of new seats.
-
Click Update seats to save your changes.
Decreasing the number of seats
To decrease the number of seats, follow these steps:
- Access your account settings.
- Select the Member and seats tab.
- Click Manage within the Seats card.
- Choose the new seat quantity.
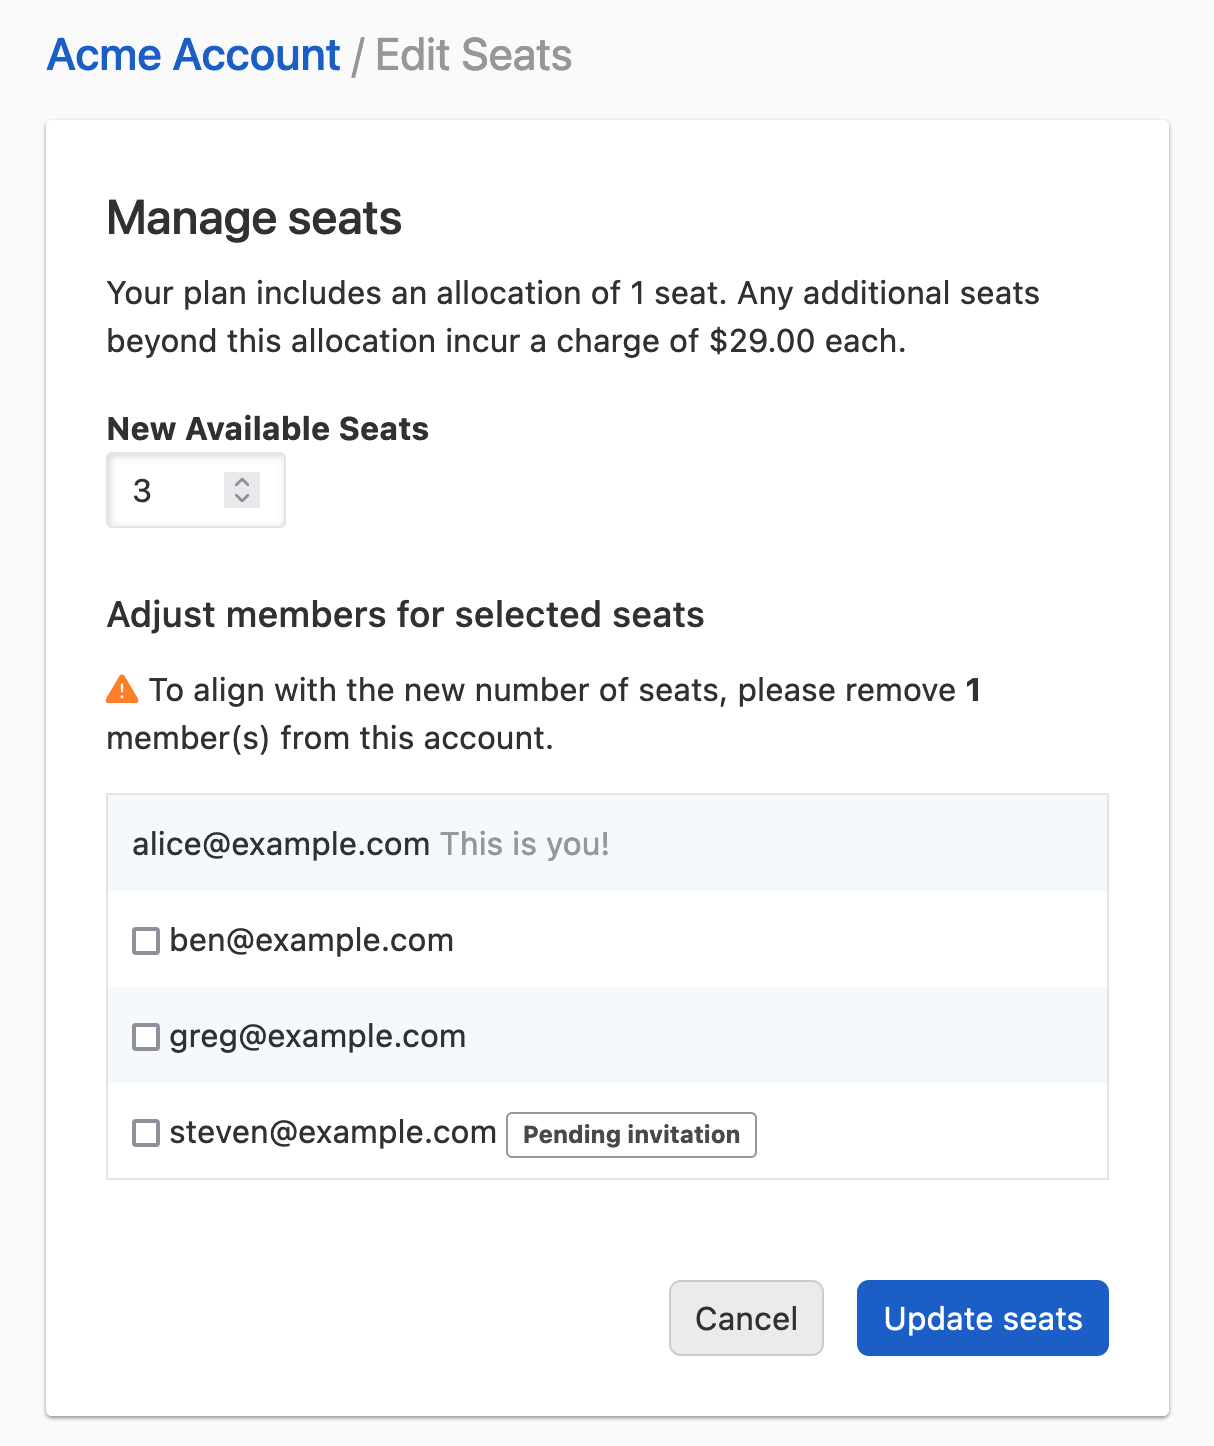
- If the new seat count is lower than your current member count, you’ll need to remove excess members to match the new seat allocation. You’ll also see a list of members, along with those who have been invited but haven’t accepted the invitation.
Below is an example of decreasing seats when the number of account members exceeds the newly selected seat count:
Removing a member from your account:
- Click Remove for the member you want to remove, and confirm that you want to remove them.
- Once you’ve removed them from the account, that user will no longer show up on the Members card.
Inviting new members
To invite new members to your account, follow these steps:
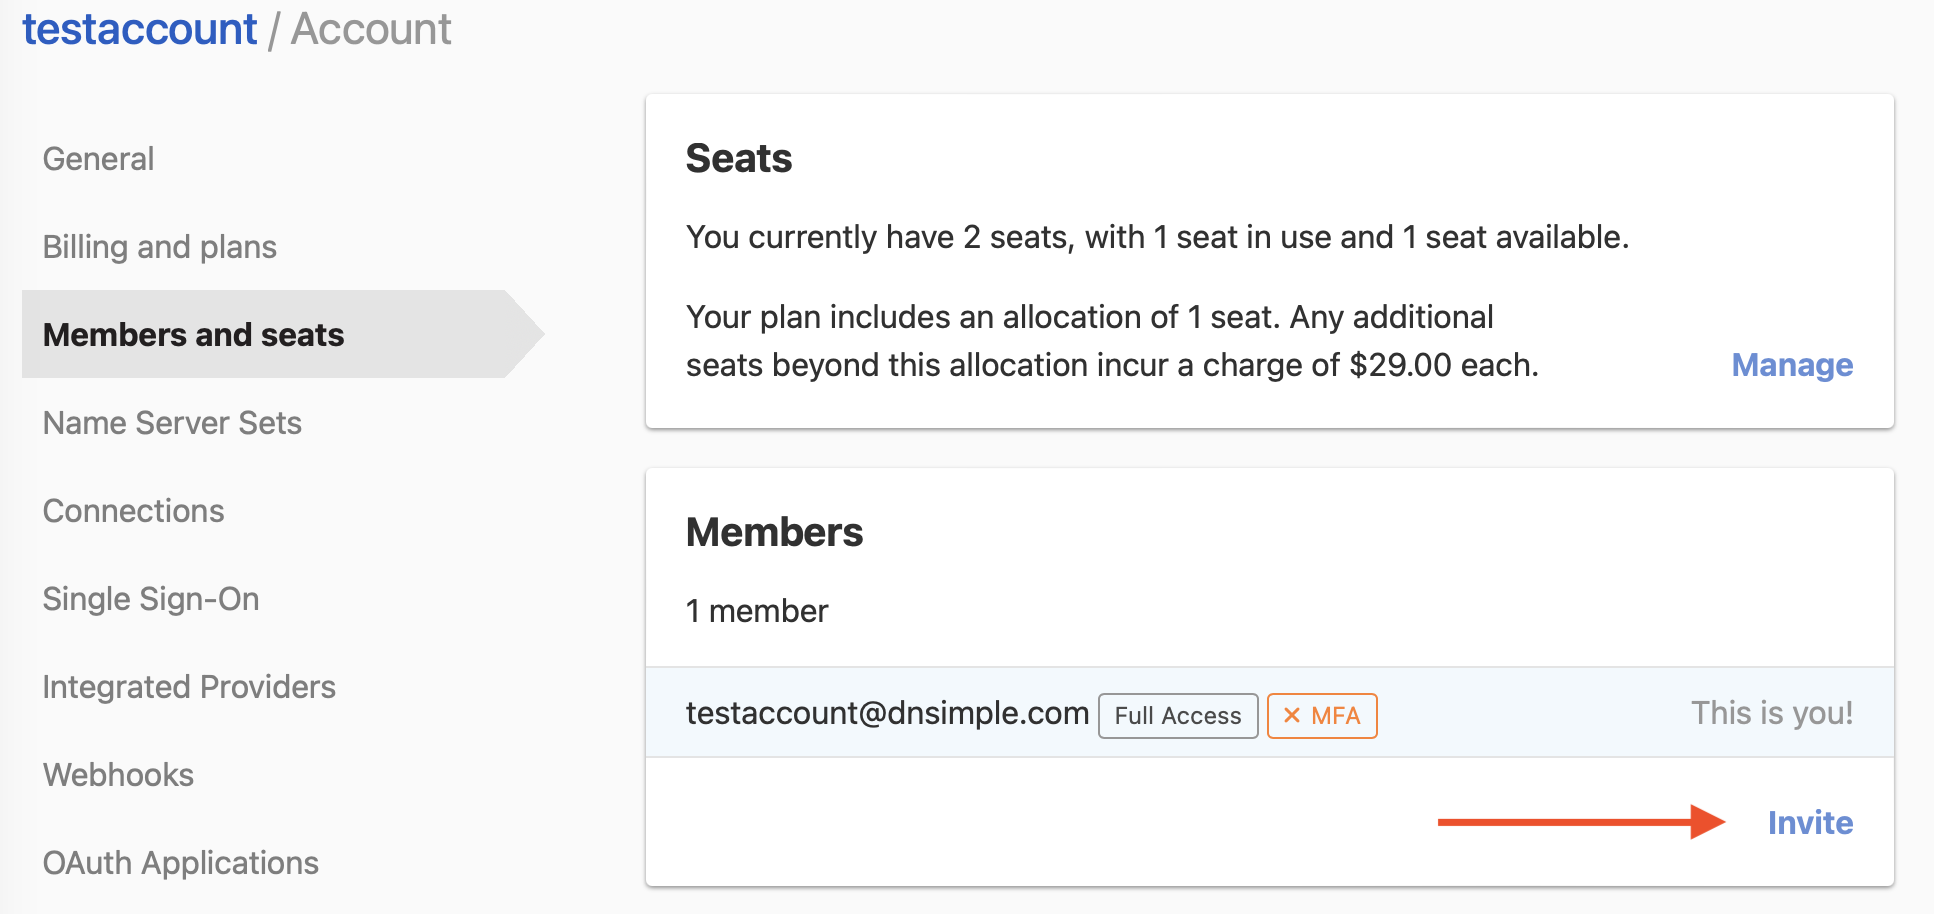
- Access your account settings.
- Select the Member and seats tab.
-
Click Invite in the Members card.
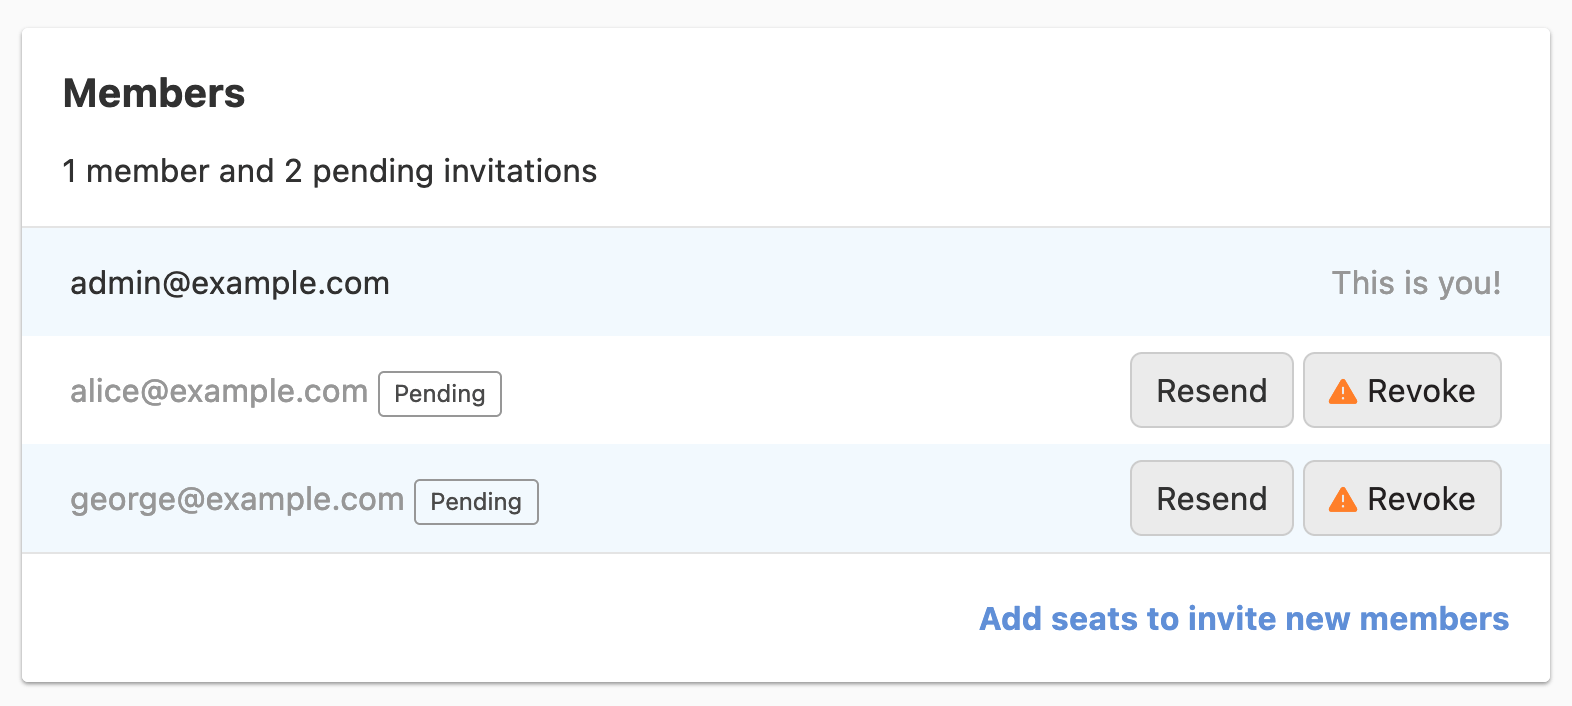
- If additional seats are required for new members, you’ll see an Add seats to invite new members button. Click it to allocate more seats.
You can increase the seat count and invite members in one seamless process.
Note
You cannot add a user who has the same email address as the account email address. You must first change the account email address (we recommend a generic email address like admin@ or billing@) before you can that user.
Automatic Seat Allocation with Single Sign-On (SSO) Providers:
If you’ve configured your account with single sign-on using Google, Okta, or Microsoft Entra, your seat count is managed based on your organization’s configuration, and seat allocation becomes automatic.
Have more questions?
If you have questions about managing seats or want to learn about upgrading to an account that offers seats, contact us, and we’ll be happy to help.