Multi-Factor Authentication
Table of Contents
- Enabling multi-factor authentication
- Disabling a multi-factor authentication method
- Logging in with multi-factor authentication
- Recovery code
- Multiple accounts
- One-time password authenticator applications
- Security keys
- Best practices for multi-factor authentication
- Troubleshooting multi-factor authentication
- Need more help?
DNSimple supports multi-factor authentication. We make this feature available for free to all user profiles, regardless of the subscription plan of any associated accounts.
Multi-factor authentication (MFA) is a multi-step security measure that helps prevent unwanted access to your account, and increases the security of your data. Once enabled, you’re prompted to provide a verification code or use a security key in addition to your username and password when you log in. Verification codes should be generated by an authenticator app and will be refreshed every 30 seconds.
Enabling multi-factor authentication
DNSimple supports MFA using the following methods as a second verification step:
- Time-based one-time password authenticator application
- WebAuthn-compatible security key
Make sure to install a one-time password authenticator application if you’ll be using one-time passwords for multi-factor authentication. You’ll need it to generate a verification code to complete the setup. Or, if you’ll be using a security key, have it ready to complete the security key registration.
When you enable MFA for your user profile, you’ll be logged out of all currently logged-in devices.
To enable multi-factor authentication with one-time password
-
Go to your user page by selecting User settings in the account switcher at the top-right corner of the screen.

-
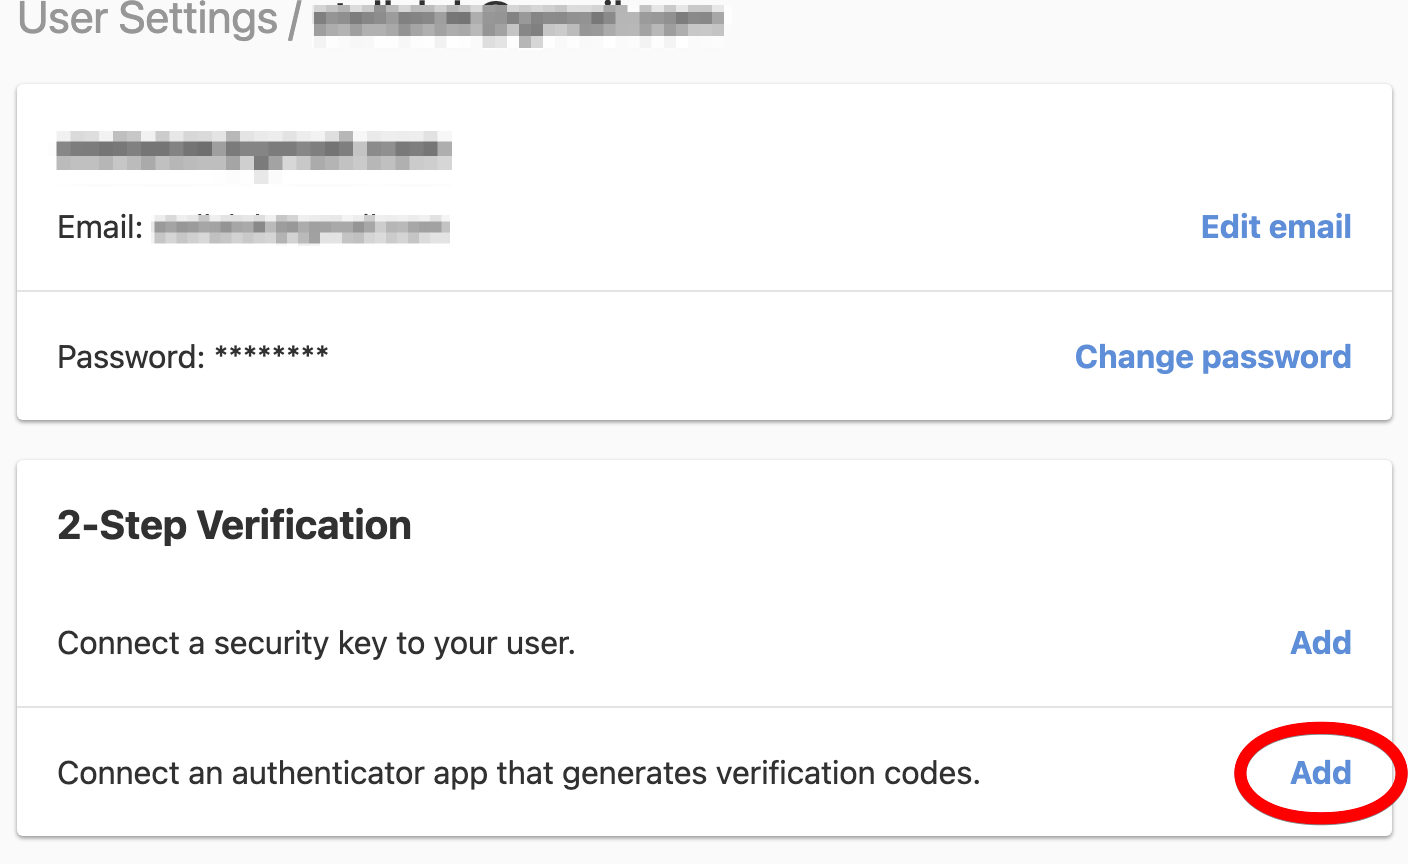
In the 2-Step Verification card, click Add next to “Connect an authenticator app that generates verification codes”.
-
Scan the barcode using a one-time password authenticator app. You can also manually enter the secret code by clicking Can’t scan the barcode? and typing the code into your authenticator.

-
Using the one-time password authenticator app, generate a verification code.
-
Enter the 6-digit verification code into the field, and click Continue to confirm. If the verification code is correct, you’ll be redirected to the next step. Otherwise, you’ll be asked to enter a new verification code.
-
Copy your recovery code by clicking Copy to clipboard. Store your recovery code in a safe place, like a password or secret management application. You should also click Download recovery code (PDF) to download a PDF file with the necessary information to recover your account should you lose access to all your multi-factor authentication devices.
Fill in the form with the last 4 characters of your recovery code, and click Continue to complete the setup of your authenticator app.

To enable multi-factor authentication with a security key
-
Go to your user page by selecting User settings in the account switcher at the top-right corner of the screen.
-
In the 2-Step Verification card, click Add next to “Connect a security key to your user” to connect a new security key to your user profile.

-
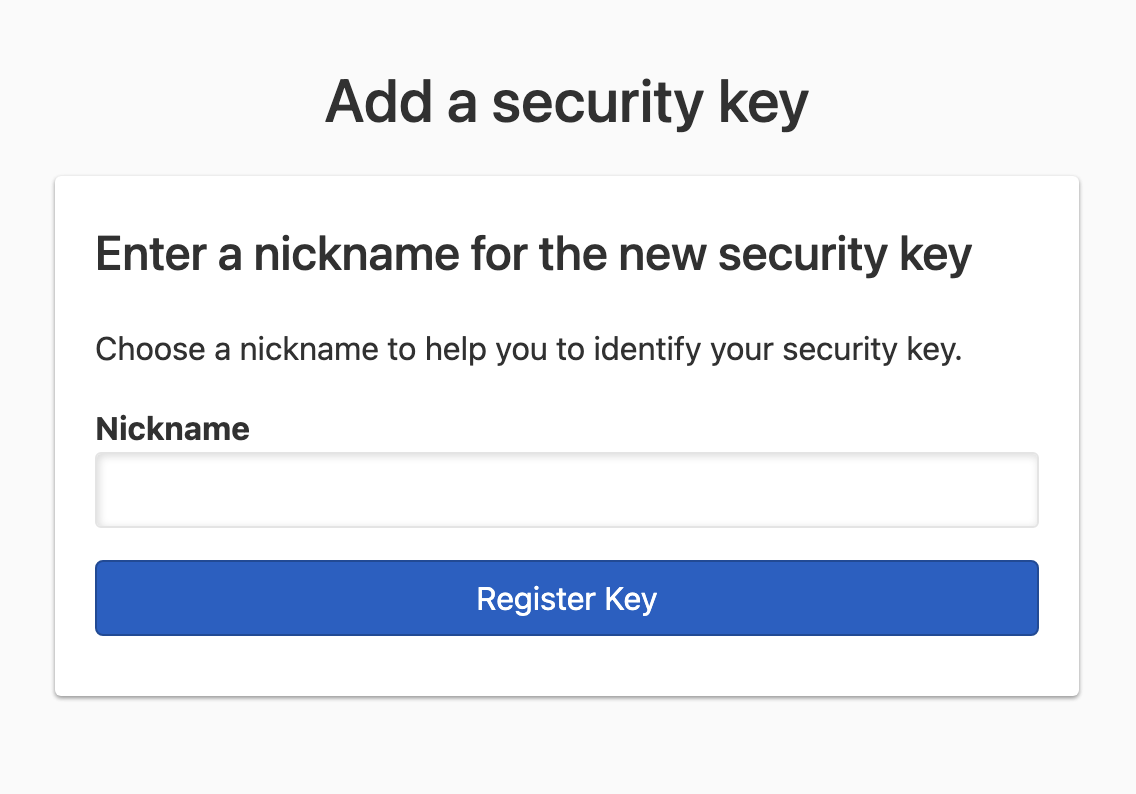
Enter a nickname to help you identify the security key you’re registering.
-
Click Continue — you should see a prompt to choose the type of security key you want to activate. The prompt will look different depending on your platform and browser. Select the security key type, and activate it to complete the security key setup process.
-
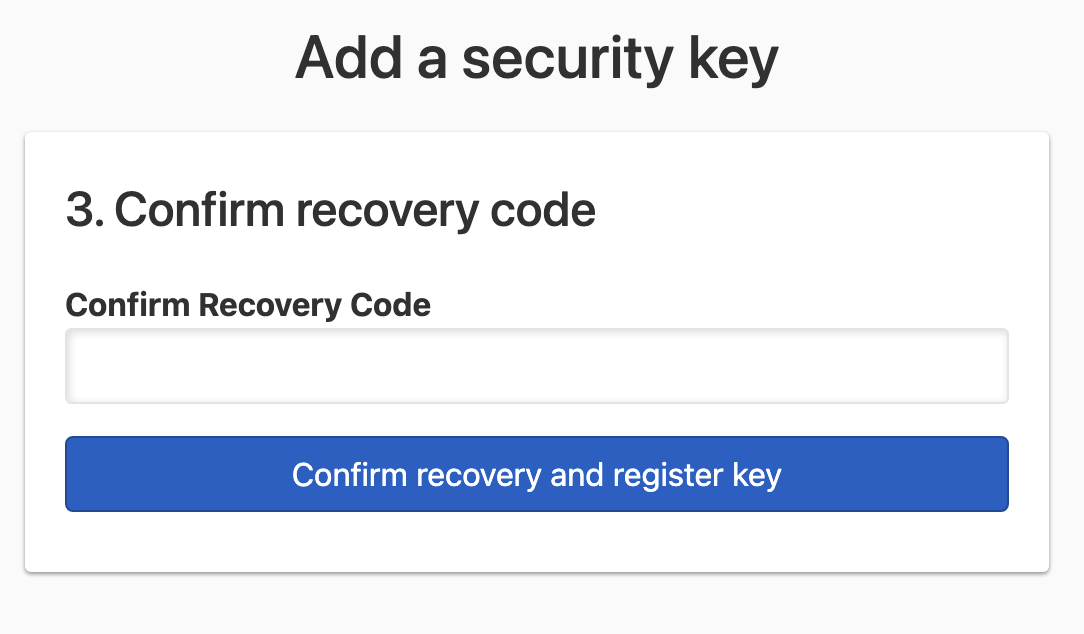
Copy your recovery code by clicking Copy to clipboard. Store your recovery code in a safe place, like a password or secret management application. You should also click Download recovery code (PDF) to download a PDF file with the necessary information to recover your account should you lose access to all your multi-factor authentication devices.
Fill in the form with the last 4 characters of your recovery code, and click Continue to complete your security key registration.
Note
Some security key types, like Touch ID on a Mac, may be tied to a browser. For example, to use Touch ID on both Chrome and Safari browsers, you may need to register a Touch ID security key in Chrome and also in Safari.
Disabling a multi-factor authentication method
You can remove a one-time password authenticator application or any security keys associated with your user profile. However, you must have at least one of them enabled at any given time.
To disable a one-time password authenticator application
-
Go to your user page by selecting User settings in the account switcher at the top-right corner of the screen.
-
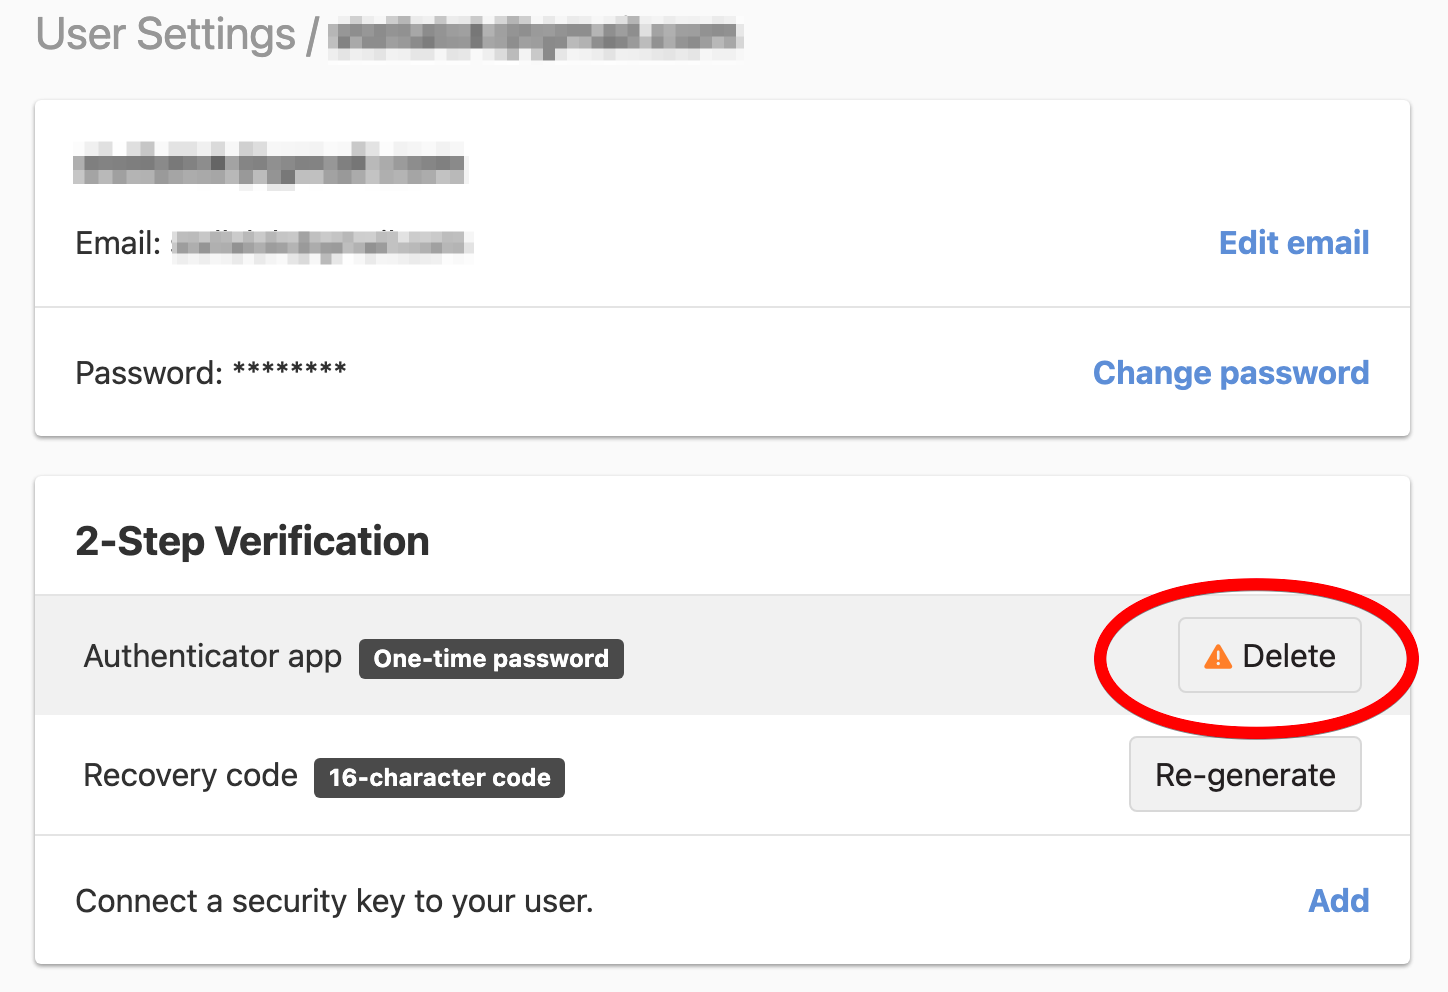
In the 2-Step Verification card, click Delete next to the displayed authenticator app configuration. This will take you to the confirmation page.
-
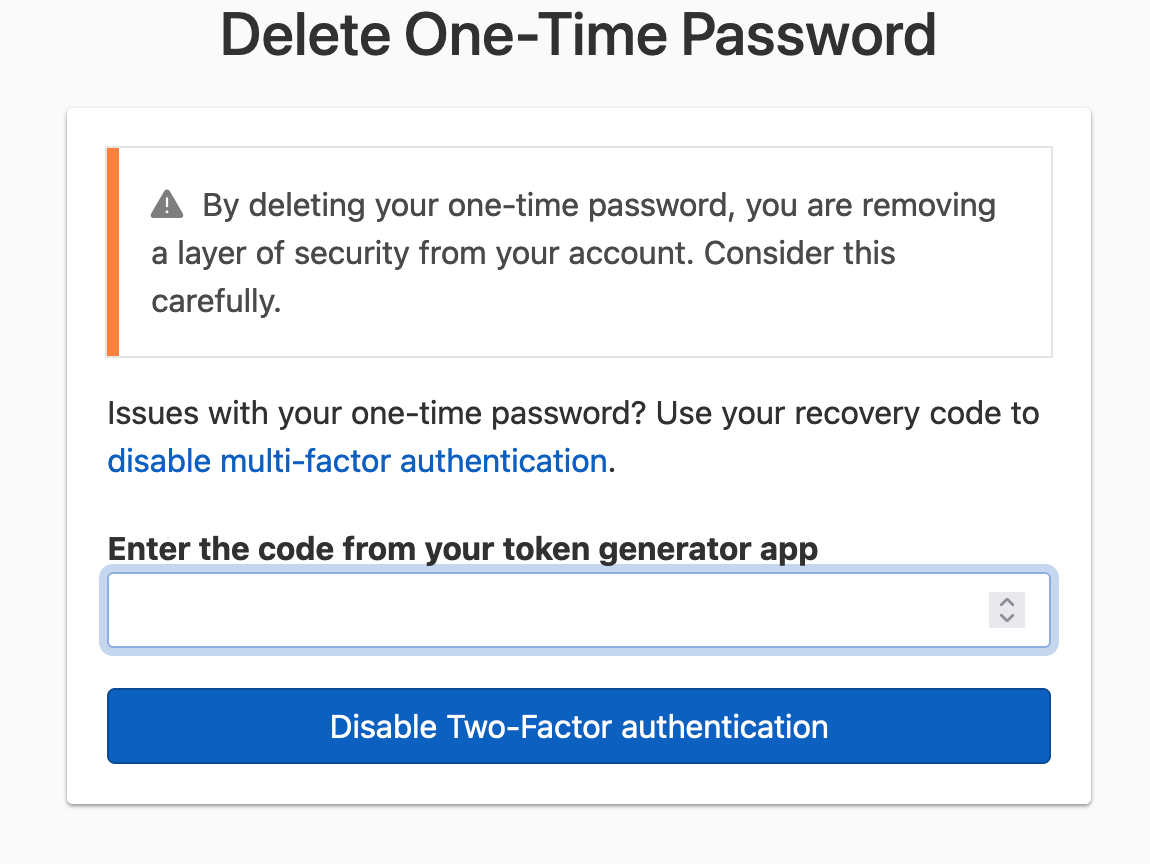
On the confirmation page, use the authenticator app to generate a new verification code, and enter your code. Click Disable Two-Factor authentication to confirm and disable multi-factor authentication via the authenticator application.
To disable a security key
-
Go to your user page by selecting User settings in the account switcher at the top-right corner of the screen.
-
In the 2-Step Verification card, click Delete next to the security key you would like to disable. This will take you to the confirmation page.

-
On the confirmation page, click Confirm deletion. You will be prompted to activate the same security key to confirm its deletion as an MFA method.

Logging in with multi-factor authentication
When multi-factor protection is enabled, you must perform a second verification step each time you log in with your username and password. The second verification step can be done with an authentication method you have enabled, like one-time passwords or security keys.
Using a one-time password
-
Log in to DNSimple with your username and password.
-
If the credentials are correct, you’ll see a 2-Step Verification window. This may look different if you also have a security key enabled.
If you have a security key enabled, it will be the default authentication method displayed. Click Use one-time password to switch to using a one-time password for the second verification step.

If you don’t have security keys enabled, you’ll see the following 2-Step Verification window immediately:

-
Use your one-time password authenticator app to generate a verification code, paste the verification code into the form, and submit it to complete the 2-step login verification process.
Note
The verification code automatically expires every 30 seconds. If the expiration is five seconds or less, wait for the next verification code to limit the possibility of an authentication failure.
Using a security key
-
Log in to DNSimple with your username and password.
-
If the credentials are correct, you’ll see a 2-Step Verification window.

-
Click Log in, select the type of security key you’ll be activating, and activate the security key.
Recovery code
When you enable your first MFA method, a recovery code is created as a safeguard. You’ll need this recovery code to disable MFA if you can’t generate a one-time password with your authenticator app, activate your registered security key, or disable an MFA method. For example, because you lost the security key or the device where the authenticator was installed. Save this recovery code in a secure, memorable place.
Warning
The recovery code is the only way to recover access to your account if you can’t generate a one-time password with an authenticator app or activate a security key for completing the 2-step verification process. Store the recovery code in a secure place. We cannot disable multi-factor authentication without this recovery code.
Note
To help you keep your recovery code accessible, we periodically ask you to confirm that you still have it. About twice a year, the next time you sign in, you’ll be asked to enter the last 4 characters of your recovery code before you can continue using your account. The prompt also lets you copy your recovery code again or download a fresh PDF copy, so take a moment to check where it’s stored each time it appears.
When you enter a valid recovery code, multi-factor protection will immediately be disabled. To keep your account protected, you’ll need to enable it again by connecting a one-time password authenticator application or security key to your user profile. A new recovery code will be generated.
Warning
All security keys and any one-time password-based MFA methods configured will be removed when you use your recovery code to disable MFA.
Disabling multi-factor authentication during login using the recovery code
-
Log in to DNSimple with your user credentials.
-
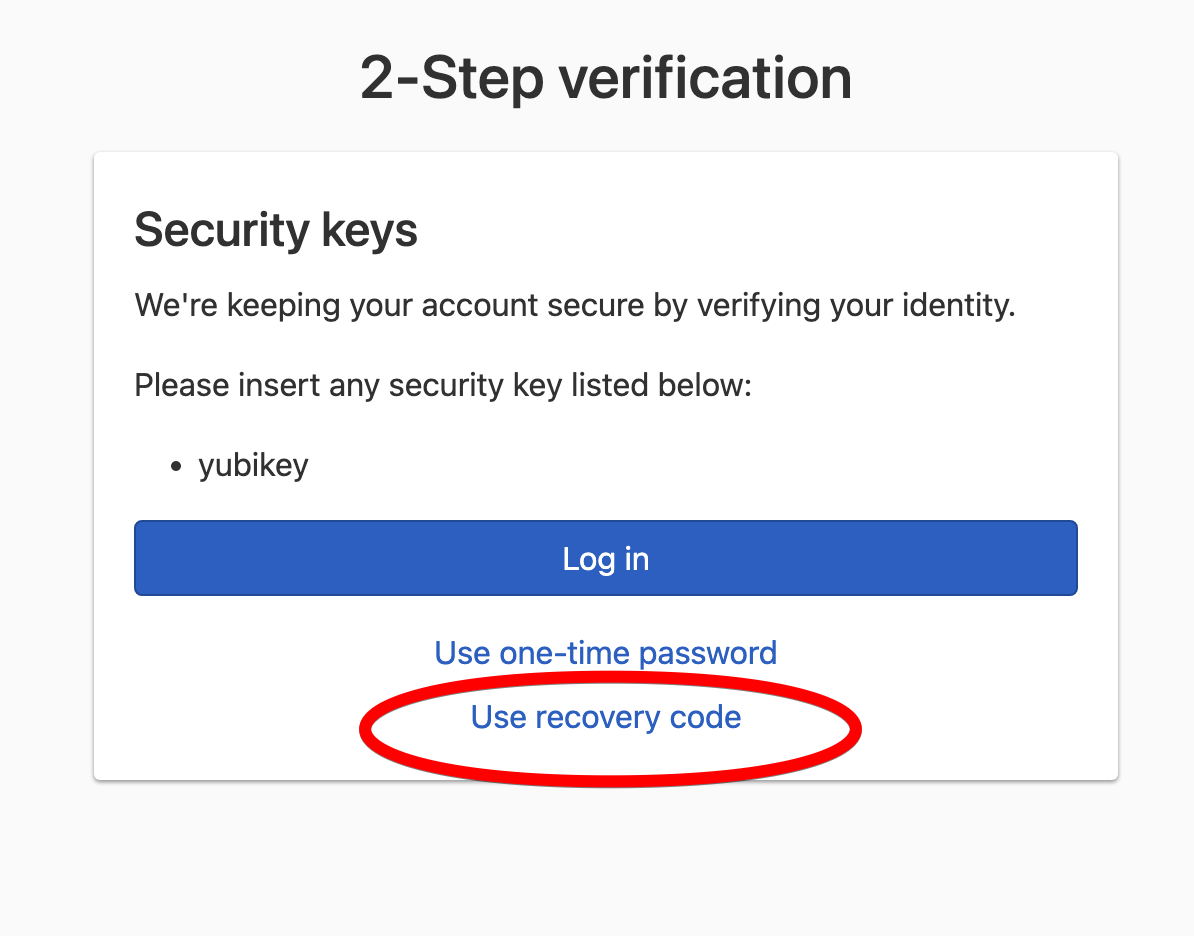
On the 2-Step Verification page, click Use recovery code.
-
Enter the recovery code, and click Log in and disable all multi-factor authentications.

-
If the recovery code is correct, MFA protection will immediately be disabled for the account.
You can also use your recovery code to disable MFA when you can’t remove a one-time password-based or security key-based MFA method.
Disabling multi-factor authentication to remove a one-time password or security key MFA method
-
Follow the steps to remove a one-time password-based or security key-based MFA method.
-
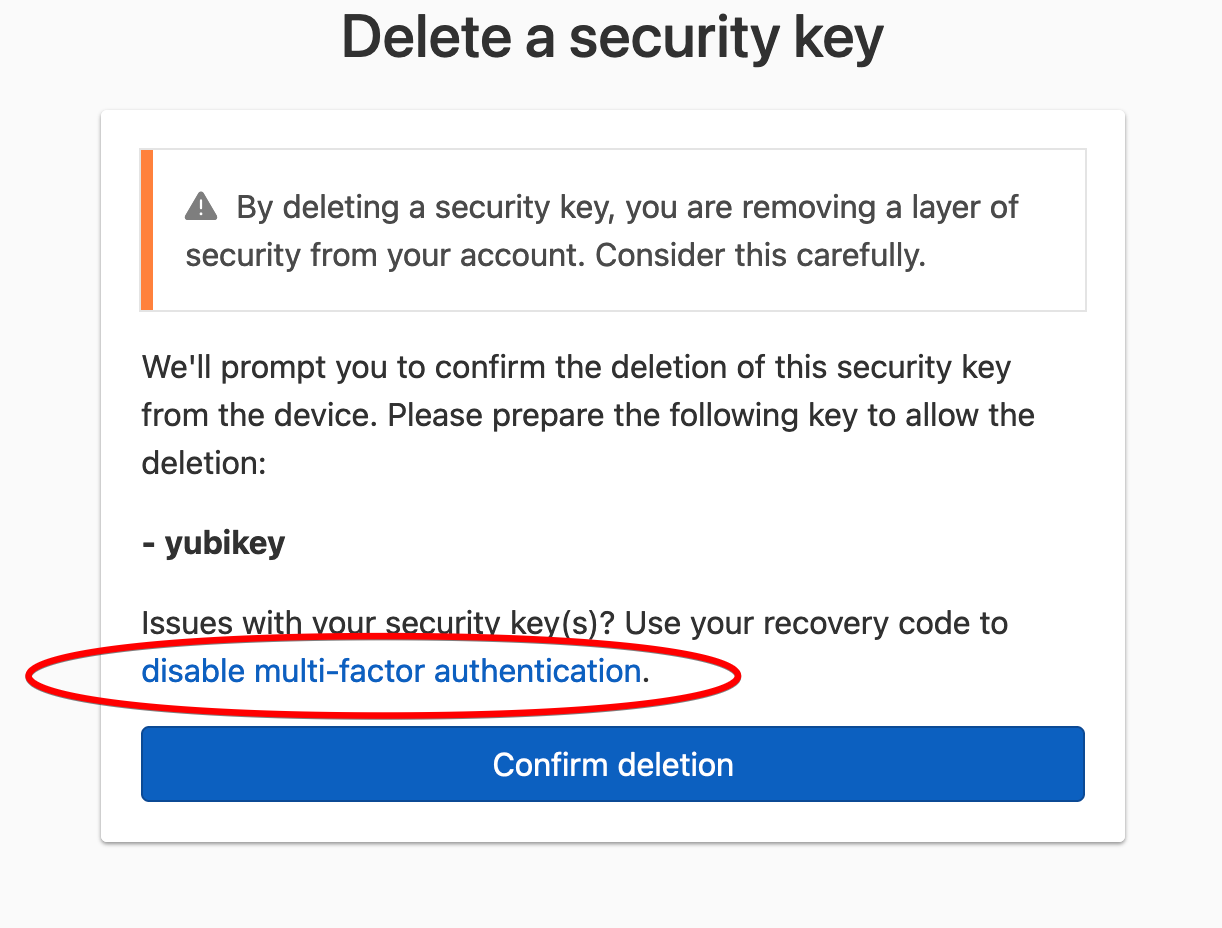
On the one-time password or security key removal confirmation page, click the disable multi-factor authentication link.
-
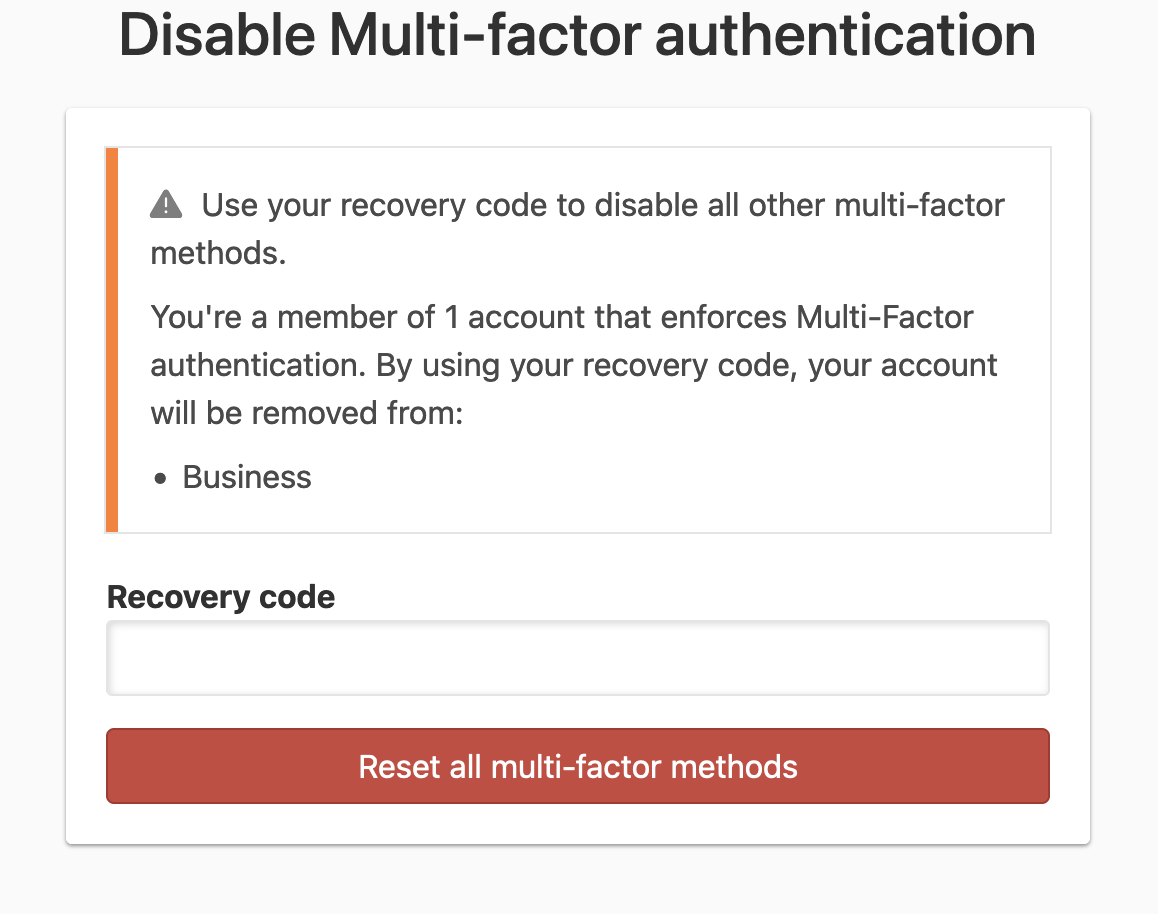
Fill in the recovery code, and click Reset all multi-factor methods.
-
If the recovery code is correct, MFA protection will immediately be disabled for the account.
Recovery codes can be regenerated. When a recovery code is regenerated, you cannot use any previously-generated recovery codes to disable MFA.
Regenerating a recovery code
-
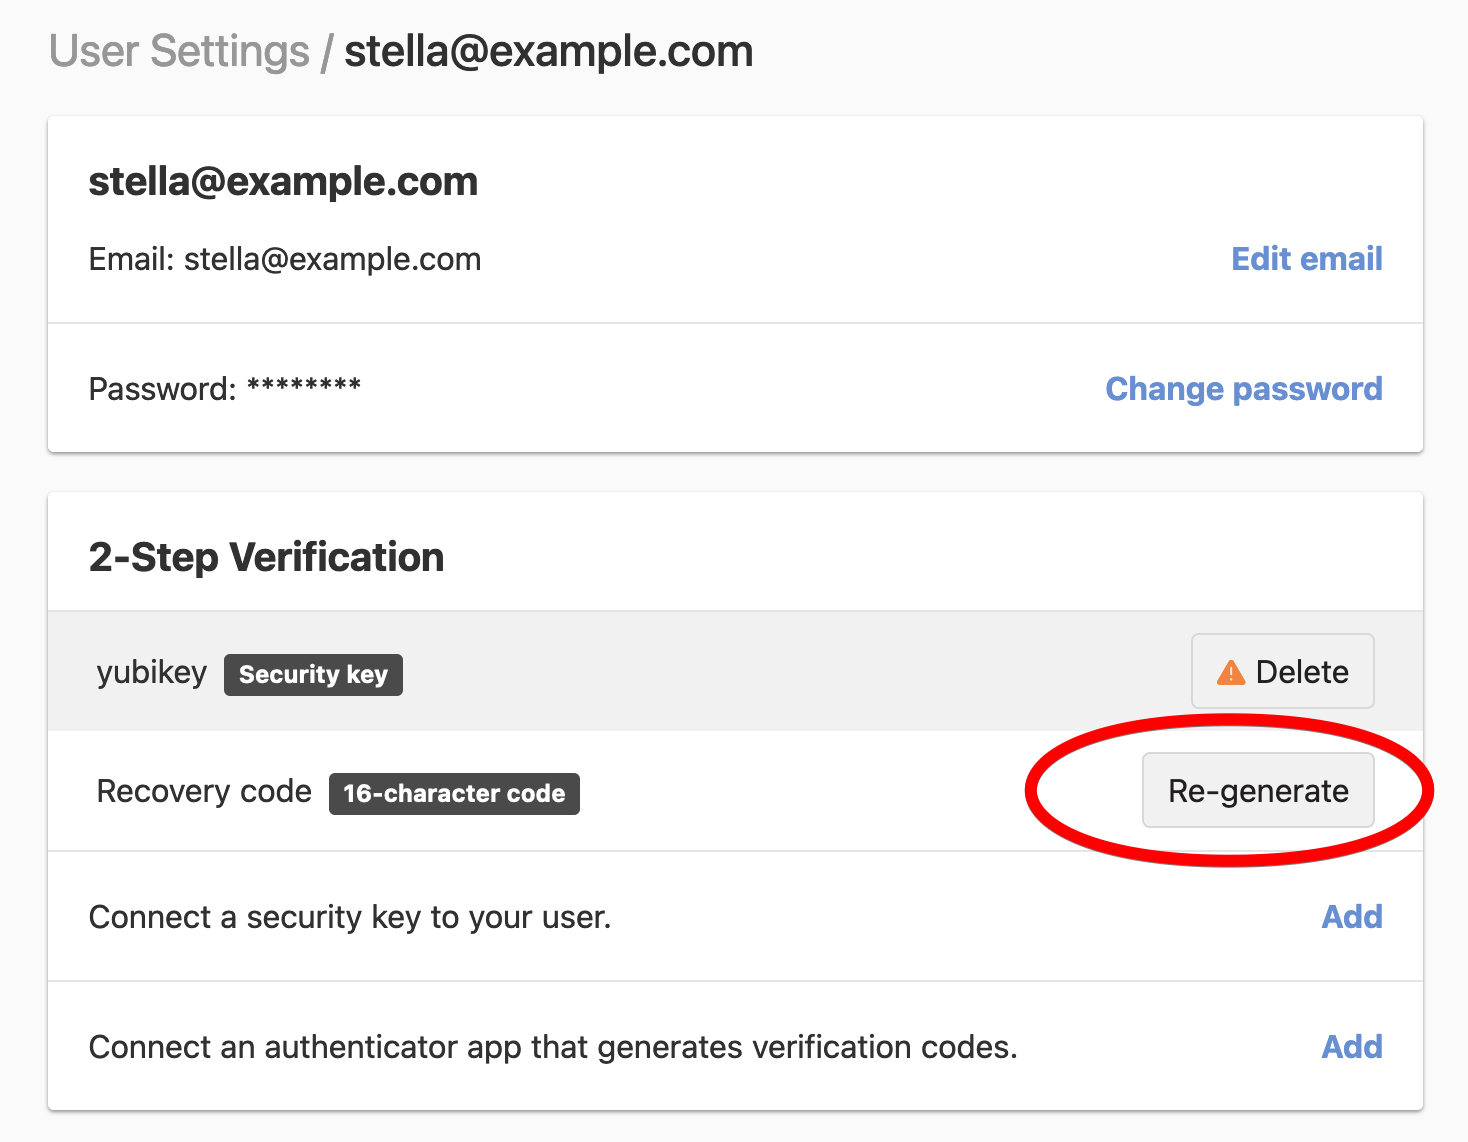
Go to your user page by selecting User settings in the account switcher at the top-right corner of the screen.
-
In the 2-Step Verification card, click Re-generate next to the existing recovery code.
-
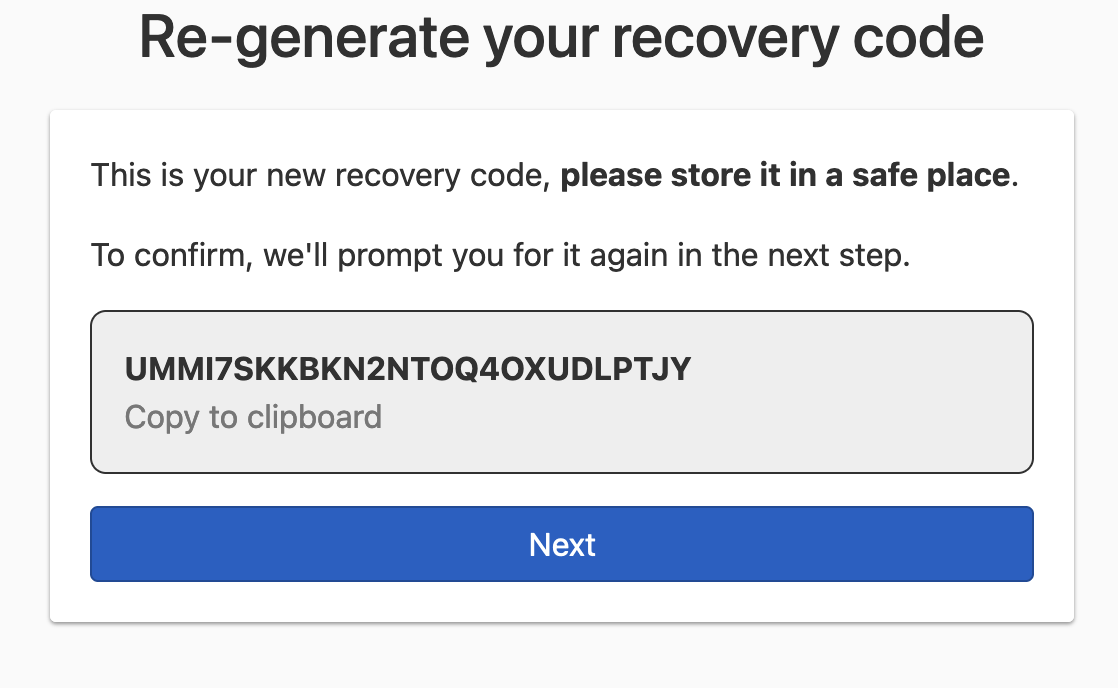
You will see a new recovery code displayed. Store the new recovery code in a safe place, and click Next to confirm the regeneration of your recovery code.
-
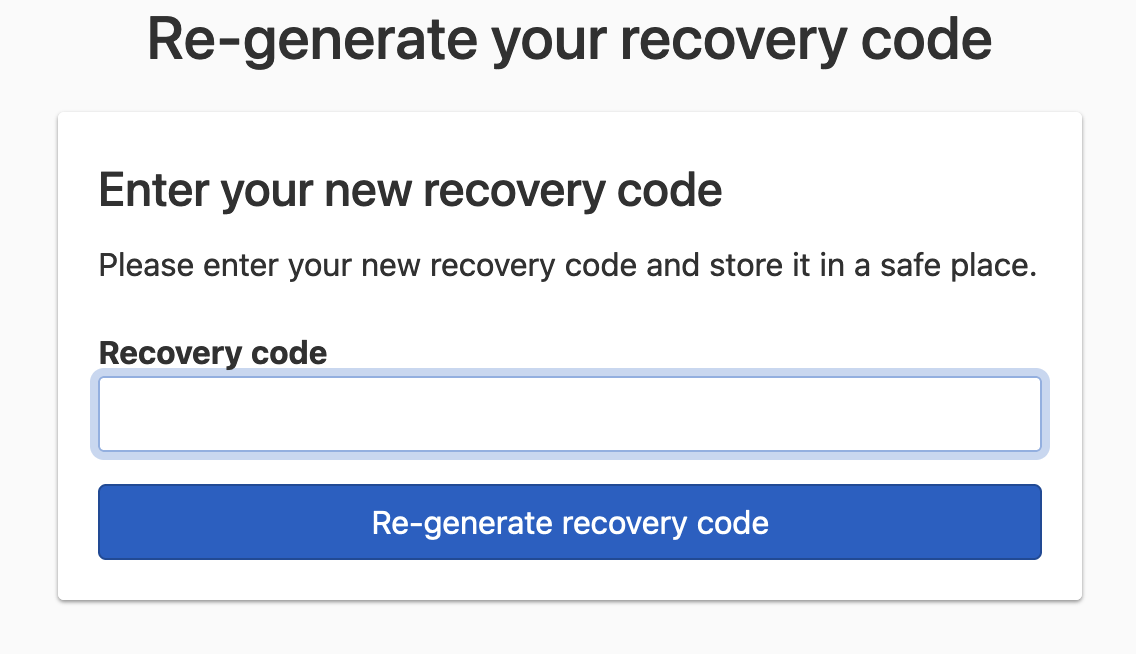
Fill in the recovery code, and click Re-generate recovery code to complete the recovery code regeneration.
Multiple accounts
Multi-factor protection is attached to a user profile, not an account, just like your username and password credentials.
If an account has multiple users, each member must enable MFA separately. If your user profile has access to more than one account, you only need to enable MFA once.
One-time password authenticator applications
DNSimple’s one-time password-based MFA implementation is based on RFC6238, also known as time-based one-time password (TOTP). Any authenticator application compatible with this specification can be used to generate a DNSimple one-time password.
There are many time-based authenticator apps that generate one-time password verification codes. Here are some we recommend:
- Google Authenticator for Android, Blackberry, and iOS devices
- 1Password for Mac, iOS devices, and Windows
- Microsoft Authenticator for Windows Phone
Security keys
DNSimple’s security key-based MFA implementation is based on the WebAuthn standard.
Both platform authenticators, e.g. Touch ID, and cross-platform authenticators, e.g. YubiKey, which are compatible with WebAuthn are supported.
Best practices for multi-factor authentication
To benefit from true MFA, you must keep your one-time password authenticator application or security key, and your primary user credentials separate. For example, if you use your mobile device as your one-time password authenticator, you shouldn’t have your primary user credentials on your mobile device.
If you decide to use your mobile device as both your security key or one-time password authenticator and device for accessing DNSimple, you still get the added benefit of a second verification step for login should your credentials be compromised, but you won’t benefit from true MFA. It’s up to you to decide what level of security is important for you and your accounts.
Troubleshooting multi-factor authentication
Ensuring your phone’s date and time are synchronized
One-time password verification codes are based on time, so the time on your phone has to be in sync with the official time. Otherwise, your authenticator app will generate a mismatched code. If your phone’s time is out of sync, or if you’ve changed time zones, the best way to fix it is to change the time settings on your phone from “Manual” to “Automatic”.
- This Apple article provides steps for iOS.
- Changing this setting on Android may vary, but a general guide can be found here.
- You can also try the Time Sync feature if you use Google Authenticator for Android.
Using a newly-generated one-time password verification code
Sometimes a one-time password verification code may not be accepted, despite entering it correctly. This usually happens when the original token was close to expiration.
The verification code automatically expires every 30 seconds. Most one-time password authenticator apps display a countdown to expiration.
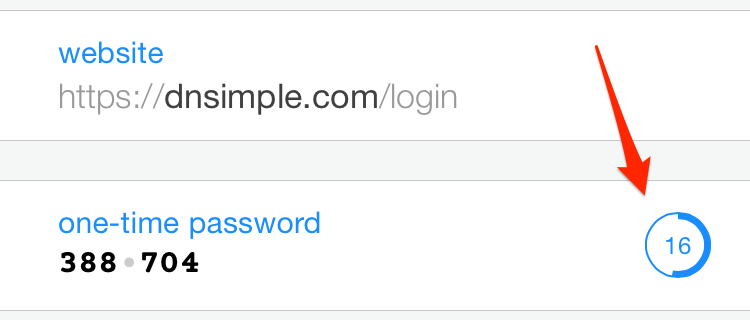
If the expiration is in five seconds or less, wait for the next verification code to limit the possibility of an authentication failure caused by time differences or connection latency.
Need more help?
If you have any questions about MFA or need assistance setting it up, contact our support team, and we’ll be happy to help.