Set Up Your First Zone and Delegate Zones to DNSimple
Last updated
Table of Contents
- 1. Add a zone
- 2. Add records to the zone
- 3. Activate the zone
- 4. Delegate your domain to DNSimple
- 5. Check the delegation
- Have more questions?
To use DNSimple for a domain’s DNS, add a zone for the domain, add its DNS records, activate the zone, then delegate the domain to DNSimple’s name servers.
1. Add a zone
You can add a zone from your dashboard or from the list.
From your dashboard
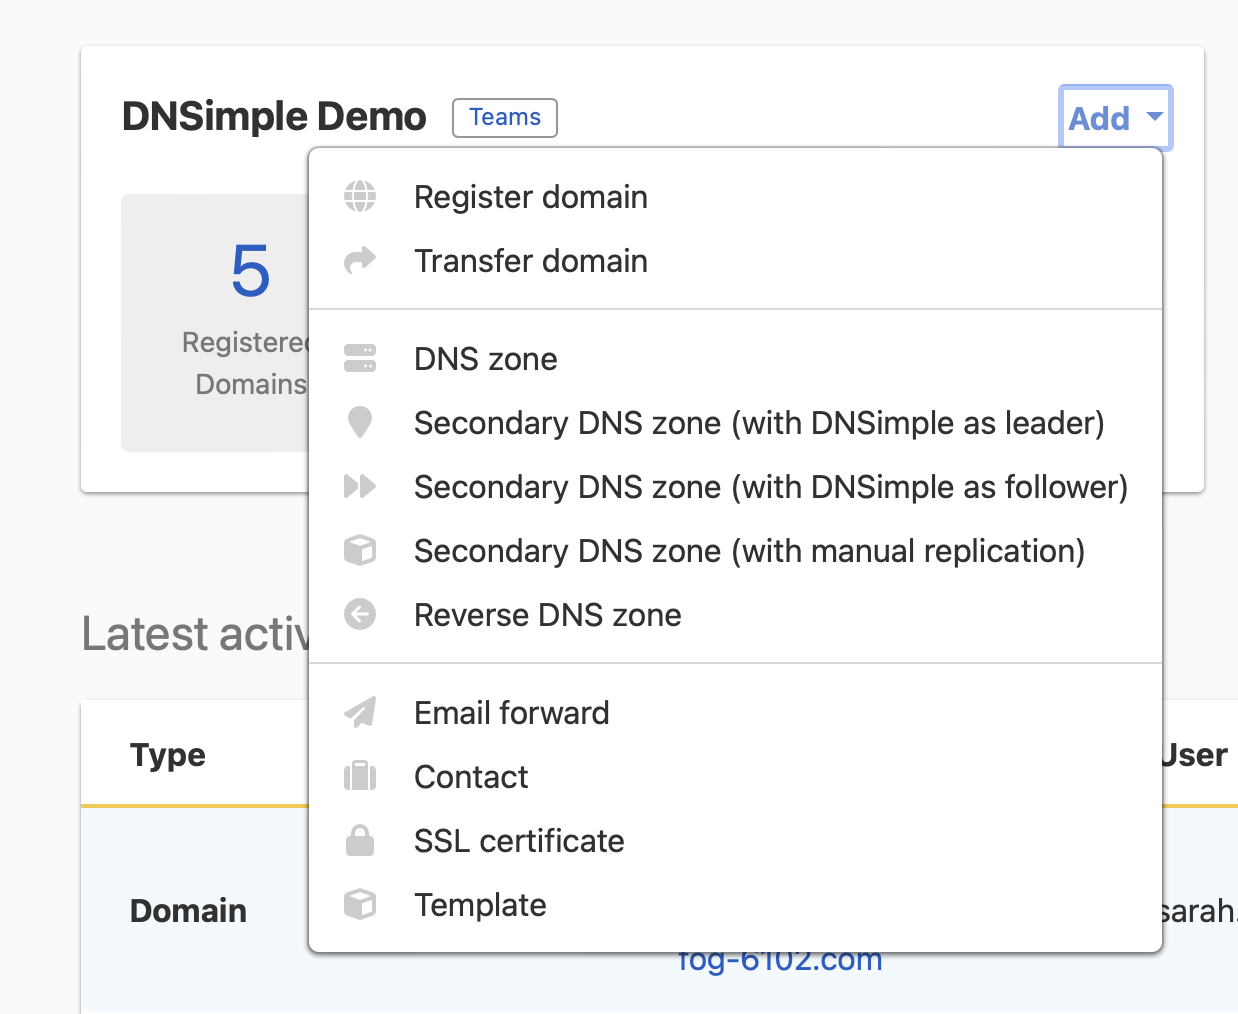
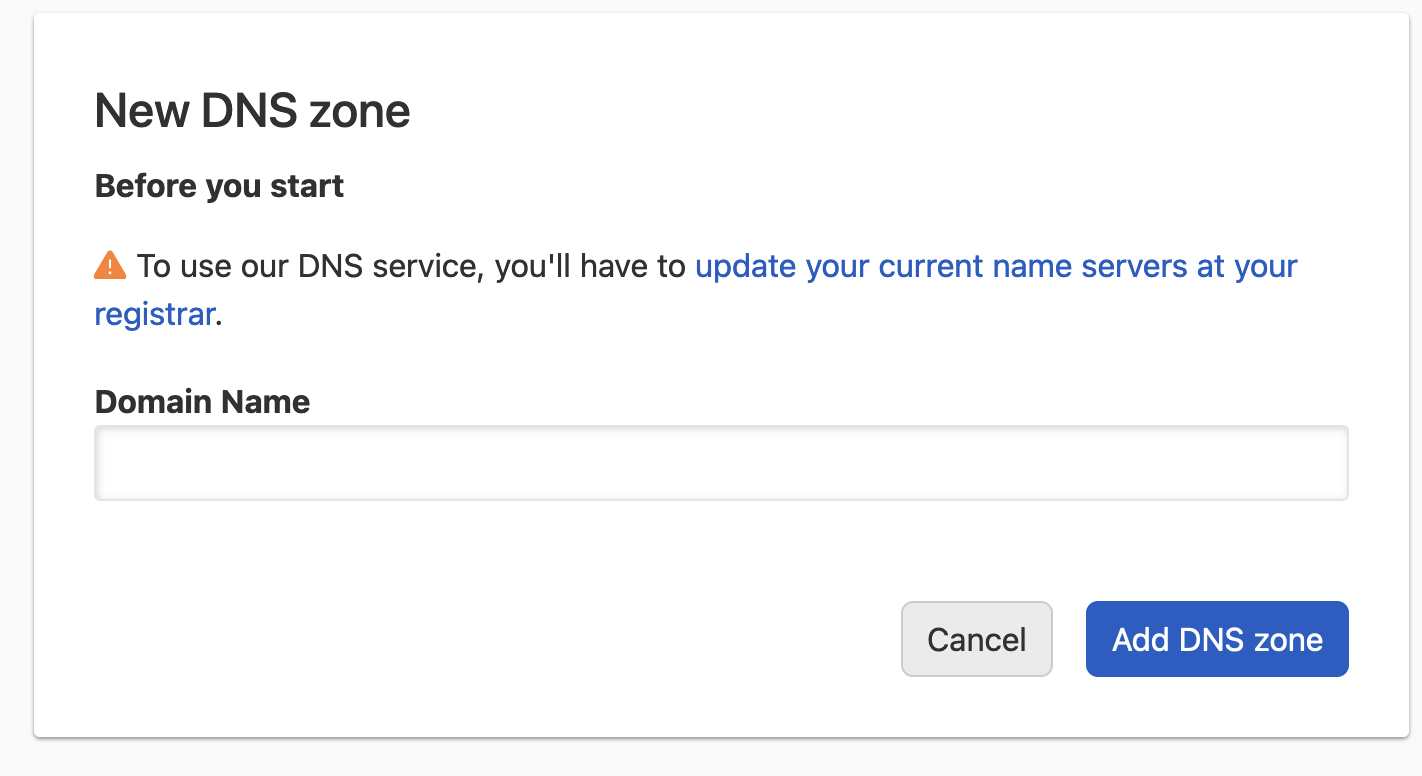
Your accounts are listed at the top of your dashboard. On the relevant account card, click , choose the type of DNS zone from the menu, then enter the name of the zone you want to add.
Note
Adding a zone to DNSimple does not make the domain resolve through DNSimple. To do that, you also need to activate the zone and delegate the domain from wherever it is registered.
From the Domain Names list
You can also add a zone from the Domain Names list. Above the list, click , then choose , one of the options, or .

2. Add records to the zone
Once you have added the zone, add its DNS records. If you are not sure which records your domain needs, see Common DNS Records. There are several ways to add them.
Import existing records
When you create a zone, DNSimple can scan your domain’s current DNS for common records and import them, so you enter fewer by hand. Check the result for any records it did not find. See Auto-Import DNS Records.
Use a connector or one-click service
The Heroku and Netlify connectors create the DNS records those platforms need.
One-click services add the DNS records needed to connect a provider to your domain. DNSimple offers services for blogging, ecommerce, email, hosting, infrastructure, and productivity providers. See how to add a service.
Use the record editor
On a domain’s page, click in the page header. The record editor lets you view, create, and manage the domain’s records. See How to Use the Record Editor.
Use the API
If you manage many zones, you can create, update, and delete zone records with the DNSimple API.
3. Activate the zone
New zones start inactive, and a zone only answers queries on DNSimple’s name servers while it is active. On the domain’s tab, click on the card. See Activate and Deactivate a DNS Zone.
Note
Activating a zone requires a subscription. If your account is not subscribed to a plan, the card shows instead.
4. Delegate your domain to DNSimple
Once the zone is active and has its records, delegate the domain to DNSimple’s name servers. How you do that depends on where the domain is registered.
Note
Delegation is set where the domain is registered, not in your DNSimple zone. The zone’s NS records are system records that DNSimple publishes, so you cannot edit or delete them in the record editor.
- Registered with DNSimple: open the domain’s tab and click on the card. To use another DNS provider, see Change delegation to another DNS provider.
- Registered somewhere else: change the name servers in your account at that registrar.
Domains registered with DNSimple
If you registered the domain with DNSimple but it does not use DNSimple’s name servers yet, enter them yourself, or click and choose the DNSimple system name server set. The set’s name servers are added to the ones already listed, so remove the old ones before you save. See Delegate a DNSimple-Registered Domain to DNSimple.
Domains at other registrars
If the domain is registered at another registrar, enter DNSimple’s name servers in your account at that registrar. See Delegate a Domain from Another Registrar to DNSimple.
If you plan to transfer the domain to DNSimple later, see Prepare a Domain Transfer to Avoid Downtime.
5. Check the delegation
After you change the name servers, check that the domain answers from DNSimple.
- The warning on the DNS tab. Until the registry lists DNSimple’s name servers, the domain’s tab warns that your changes may not take effect because the domain is delegated elsewhere. After you change the name servers, click on the warning. It can take a few minutes to clear. See Verify Domain Resolution.
-
Check from the command line.
dig NS example.com +shortlists the four DNSimple name servers once delegation is in place. See the Name Server Delegation Checklist. - Allow for caching. Resolvers can keep using the old name servers until their cached copy expires. For .COM domains, that can take up to 48 hours. See How DNS Caching and TTL Affect DNS Changes.
Have more questions?
If you have any questions about setting up or delegating zones, contact support, and we’ll be happy to help. You can also read more about DNS hosting at DNSimple.